Last Updated on February 9, 2026 by Sunit. S. Ekka

Quick Guide: Shoulder Bursitis Exercise Success
- Relief timeline: 2-4 weeks with consistent daily exercises
- Equipment needed: Just a wall – no gym membership required
- Exercise schedule: 15-20 minutes daily, 2-3 sessions
- Safety first: Stop if pain exceeds 4/10 intensity
- Best results: Combine stretching + strengthening exercises
- When to seek help: No improvement after 3-4 weeks
Pain on the tip of the shoulder when doing overhead activity could be due to bursitis of the shoulder. It should not be confused with frozen shoulder pain, which is primarily characterised by stiffness with shoulder pain during sleep at night.
In shoulder bursitis, pain feels like a throbbing kind that increases with any shoulder movement. Doing overhead activities like changing clothes and combing the hair becomes almost impossible.
Shoulder bursitis physical therapy exercises can immensely benefit this kind of pain. I have treated many shoulder bursitis cases in our clinical settings. In this article, I share exercises that actually work.
What is Shoulder Bursitis?
Inflammation of the shoulder bursa is known as shoulder bursitis. Now, you might be wondering what this bursa is. The bursa is a sac or a cavity filled with lubricating fluid near joints between bone, muscle, and tendons to reduce friction and irritation during joint movement.
The bursa is present around almost all major movable joints of our body, and in fact, we term swelling of any bursa as bursitis.

It is situated around the tip of the shoulder, just below the acromion process. This is why the exact term for shoulder bursa is subacromial bursitis, and the disease is called “subacromial bursitis”. This image clearly shows the location of subacromial bursitis.
8 Best Physical Therapy Exercises for Shoulder Bursitis Relief
Exercise in shoulder bursitis helps reduce pain and stiffness, improve range of motion, and prevent further injury. Exercises for shoulder bursitis typically focus on stretching and strengthening the muscles around the shoulder joint.
Stretching exercises help to improve flexibility and relieve tension in the affected area, while strengthening exercises can help to build up the muscles that support the joint and improve stability.
So, let us start with the posterior capsule stretch.
Exercise 1: Posterior Capsule Stretch for Pain Relief

So, if you’re experiencing pain in your right shoulder, I have a simple exercise you can do, either sitting or standing. This will help stretch the muscles behind your shoulders and hopefully ease the pain. All you need to do is:
- Raise your right elbow to chest level and put your left hand on your right elbow.
- Then, use your left hand to gently pull your right arm towards your chest until you feel a nice stretch in the back of your shoulder.
- Hold that position for 30 seconds, and then release.
- Remember, this is a stretching exercise, so it’s best to do it three times in a session and not more than that.
Exercise 2: Doorway Stretch to Improve Shoulder Mobility

The door stretch for shoulders is a simple but effective exercise that can help improve shoulder mobility and flexibility. You’ll need a door frame and a little space to perform this exercise. Here are the steps to follow:
- Stand facing a door frame with your feet shoulder-width apart.
- Raise your arms to the sides so they are parallel to the floor, with your elbows bent at 90-degree angles and your palms facing forward.
- Place your forearms on either side of the door frame, with your elbows at shoulder height and your palms facing inward.
- Slowly lean forward, allowing your chest to move through the door frame while keeping your forearms in place.
- Hold this position for 15-30 seconds, then slowly release and return to the starting position.
- Repeat the stretch 2-3 times.
Remember to start slowly and gradually increase the intensity of the stretch as your flexibility improves. And, of course, if you experience any pain or discomfort during the exercise, stop immediately and consult a medical professional.
Exercise 3: Wall Push Exercise for Shoulder Strength

This exercise aims to strengthen the shoulder flexor group of muscles located on the front of the shoulder and responsible for shoulder flexion movement.
- Stand in front of a wall with your feet shoulder-width apart (figure a).
- Bend your elbow at a 90-degree angle so your forearm is parallel to the ground.
- Press your fist against the wall with enough force to engage the muscles in the front of your shoulder.
- Hold this position for a minimum of 5 seconds, focusing on maintaining the engagement of the shoulder flexor muscles.
- Relax and release the pressure on the wall.
- Repeat the pressing and releasing motion for at least 20 times in a single session, maintaining the 90-degree angle at the elbow throughout the exercise.
Exercise 4: Back-to-Wall Strengthening Exercise
This static shoulder extensor strengthening exercise is to strengthen the shoulder extensor group of muscles. These muscles are present at the back of the shoulder. For this exercise,
Sure, here are the steps for the static shoulder extensor strengthening exercise:
- Stand with your back facing a wall (figure b).
- Keep your arm in contact with the wall.
- Engage the muscles in the back of your shoulder and try to push the wall with optimum effort.
- Maintain this push against the wall for 5 seconds.
- Relax and release the push.
- Repeat this exercise for a minimum of 20 repetitions in a single session.
Exercise 5: Inner Shoulder Strengthening Against Wall (a)

Here are the steps for the static shoulder adductor strengthening exercise against the resistance of a wall:
- Stand upright facing a wall, with your feet shoulder-width apart and your arms by your sides.
- Place the inner side of the forearm you want to exercise against the wall at about waist height, with your elbow slightly bent.
- Press your hand firmly against the wall, engaging the muscles in your shoulder and upper arm.
- Hold this position for a count of 10-15 seconds, focusing on maintaining steady pressure against the wall.
- Relax and then repeat the exercise for 3-4 sets, gradually increasing the duration as your strength improves.
Exercise 6: Outer Shoulder Strengthening Exercise (b)
On the outer side of the shoulder is a group of muscles whose action results in the shoulder abduction movement. This group of muscles is known as the abductor muscles.
For this exercise:
- Stand with the side of your body facing a wall.
- Position the outer side of your arm against the wall at shoulder height.
- Press the wall with your arm as if you are trying to move your arm away from your body.
- Hold this position for 5 seconds, focusing on using your shoulder muscles to press against the wall.
- Release the pressure and relax your arm.
- Repeat the pressing motion for a minimum of 20 repetitions in a single session, focusing on maintaining good form and control throughout the exercise.
Exercise 7: Assisted Shoulder Flexion with Cane or Stick

This exercise is performed in the standing position. For this, we need a cane, stick or broomstick that may be available in your home.
- Hold the cane with your hand, and remember that the backside of the forearm should be facing forward.
- Then, slowly elevate your shoulder, holding the cane, and take it to the point where you feel slight stiffness or pain.
- After that, lower down slowly.
- Repeat the process at least 20 to 30 times in a single session.
Exercise 8: Gentle Pendulum Swing for Shoulder Mobility

The shoulder pendulum exercise is a gentle stretching and mobilization exercise that helps to loosen up the shoulder joint and surrounding muscles. To perform this exercise:
- Start by standing with your feet shoulder-width apart and leaning forward slightly, resting your non-injured hand on a table or other stable surface to support your upper body.
- Next, let your injured arm hang straight down towards the floor, with your hand relaxed and fingers pointing towards the ground.
- Begin to gently swing your arm back and forth in a pendulum-like motion, gradually increasing the size of the circles you are making.
- As you swing your arm, try to relax your shoulder as much as possible, allowing the weight of your arm to create the movement.
- You can also try swinging your arm in different directions, such as side to side or in a circular motion, to target other areas of the shoulder joint.
Remember to keep your movements slow and controlled, and stop if you experience any pain or discomfort. This exercise is great for improving the range of motion and flexibility in the shoulder joint and can be especially helpful for those recovering from a shoulder injury or surgery.
Shoulder home exercise chart PDF
I strongly suggest you to also download shoulder pain home exercise chart with all the exercises on this post and other useful exercises. All these exercises are described in clear picture that anyone can learn and perform.
Shoulder Bursitis Symptoms: How to Identify the Pain
Shoulder pain is the main symptom of bursitis shoulder. However, one should not get confused with “frozen shoulder pain, ” perhaps the more common cause of shoulder pain.
To make things easier, remember that the subacromial bursitis pain location is on the tip of the shoulder. Other than this, it commonly presents with the following symptoms:
- Pain has a history of gradual onset that increases over weeks or months.
- The location of pain is on the outside of your shoulder and, to be specific, on the tip of the shoulder.
- Pain may spread down your arm towards the elbow or wrist as the symptoms increase.
- Subacromial bursitis sufferers usually complain of worse pain when lying on the affected shoulder. It also increases when overhead activity is performed.
- The shoulder becomes swollen and warm to the touch.
- Your pain becomes so unbearable that to get the slightest of relief, you need to hold your hand across your chest.
- Painful arc of movement – shoulder pain felt between 60 – 90° of the arm moving up and outwards.
- When your arm is by your side, there is minimal pain and above 90° relief of pain.
What Causes Shoulder Bursitis? (Risk Factors & Prevention)
Any repetitive friction/ trauma or direct impact on the tip of the shoulder causes an impact in the subacromial bursa, which results in subacromial bursitis. The following figure simplifies it.

Risk Factors That Lead to Shoulder Bursitis Development
- The stiffness of the shoulder complex joint.
- Occur secondary to calcific tendinitis of the supraspinatus tendon.
- Instability of the shoulder joint.
- The tightness of muscles around the shoulder
- Poor posture
- Inadequate recovery from training or activity
- The weakness of muscles around the shoulder.
- Inadequate rehabilitation following a previous shoulder injury or surgery.
- Sports injuries occur during tennis, swimming, and badminton. Etc.
How can your physiotherapist help you?
When you go to your physiotherapist, he will take your history of pain and all your previous treatments. He will thoroughly observe and inspect the shoulder for swelling and tender/painful spots.
Physiotherapist will examine
- Active movement: Active movement is the movement of the shoulder, which the patient does without help. Active movement is found to be affected in all directions.
- Passive movement: It is done with the support of the physiotherapist. Passive movement is affected due to pain, but if done cautiously, it is full and free.
- Resisted movement: Here, the therapist opposes the movement done by the patient, and the patient has to apply more force. Usually, the patient is hesitant to do this, but if done carefully, except for abduction of the shoulder, all the other movements are STRONG and PAINLESS. (see figure)

Physiotherapy treatment for subacromial bursitis
During the acute stage, shoulder pain is the main concern, so the treatment aims to resolve acute pain and swelling and prevent further damage. We can achieve this by the following means:
- Rest to the shoulder using a shoulder sling and avoid movement on the shoulder joint.
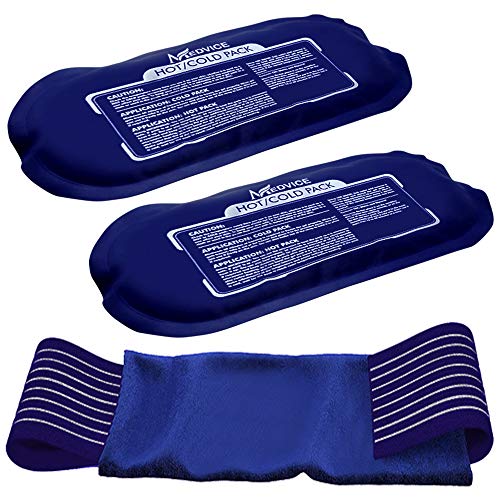
- Icing for 20 minutes and five times/day using ice or a shoulder cold pack.


Resolution of the acute stage is characterised by the absence of rest pain, and abduction movement becomes pain-free up to 90 degrees of angle.
Now you can start simple exercises such as the pendulum exercise using a weight of no more than 3 kg of weight. The following figure shows the pendulum exercise. However, you can use a weight such as a bottle filled with water or a sandbag (slat packet).
Keep Reading: Grinding Shoulder Blade? Could be Snapping Scapula Syndrome, Here’s 6 Easy Exercises to cure it
Frequently Asked Questions
The author is a physiotherapist who has been practising for the last 17 years. He holds a Bachelor's in Physiotherapy (BPT) from SVNIRTAR (Swami Vivekananda National Institute of Rehabilitation and Research), one of the prestigious physiotherapy schools in India.
Whatever he learns dealing with his patient, he shares it with the world through blogs and e-books. He also owns a YouTube channel, "Sunit Physiotherapist" with over 8 lakh active subscribers. Here, he shares everything he gets to learn serving the patient.