Last Updated on February 6, 2026 by Sunit. S. Ekka

- A structured, phase-based exercise program is critical to recover from elbow stiffness after a fracture.
- Rehab must begin immediately after surgery, focusing first on the wrist and shoulder.
- This guide provides the exact week-by-week protocol and 15 exercises I use with my patients.
Stiffness of the elbow joint is the most common complication, affecting 10–15% of patients following elbow trauma. Research shows that a 50% reduction in elbow range of motion can lead to an 80% decline in upper limb functionality, severely impacting daily life and work 1.
In my clinical practice, I have found that in addition to elbow stiffness, shoulder and wrist joint stiffness may also develop on the same hand2.
To prevent stiffness, exercises should begin immediately after surgery (often within 48 hours) when the medical condition becomes stable. The research also finds that the majority of range of motion recovery occurs in the early postoperative period2.
In this article, I will share the most effective exercises I usually prescribe to my patients so they can quickly and effectively improve and get back to work as soon as possible.
- Elbow Fracture Rehab Protocol: A Week-by-Week Guide
- Phase 1: Early Motion (Weeks 0-3 Post-OP)
- Phase 2: Increasing Mobility (Weeks 3-6 Post-OP)
- Phase 3: Restoring Elbow Motion (Weeks 6-10)
- Exercise 6: Active Elbow Flexion and Extension
- Exercise 7: Forearm Rotation (Pronation/Supination) with a Cane
- Exercise 8: Isolated Wrist Flexion and Extension
- Exercise 9: Isolated Wrist Circles
- Exercise 10: Active Shoulder Elevation
- Exercise 11: Shoulder Range of Motion with a Pulley
- Exercise 12: Gentle Elbow Stretching with Overpressure
- Exercise 13: Wrist Stretching for Flexors and Extensors
- Exercise 14: Progressive Grip Strengthening
- Phase 4: Strengthening & Return to Activity (Weeks 10-12+)
- Elbow fracture rehabilitation exercise ebook
- Conclusion: Your Path to Full Recovery
- FAQ
Elbow Fracture Rehab Protocol: A Week-by-Week Guide
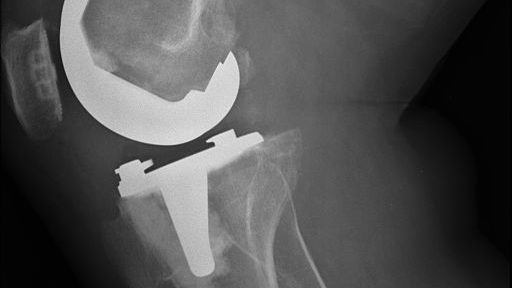
An elbow fracture can occur at several different locations around the elbow joint. These fracture conditions could include a supracondylar fracture, olecranon fracture, radial head fracture, or fracture of the lower end of the humerus shaft.
After a surgeon reduces an elbow fracture, the elbow is immobilised using a sling or a plaster cast for 3 to 6 weeks, depending on the condition.
Due to long-term plaster immobilisation, elbow joint stiffness develops. Studies indicate that immobilization beyond 2 weeks can significantly increase the probability of this complication.
However, the stiffness is not restricted to the elbow; it also affects the wrist and shoulder joints.
To prevent stiffness, exercises should begin immediately after surgery when the medical condition becomes stable. We have to start with light exercises and then progress to more severe ones as we progress.
This is why the post-operative period is divided into four phases: weeks 0 to 3, weeks 3 to 6, weeks 6 to 10, and weeks 10 to 12 onwards.
Note: Perform all these exercises at least twice daily; however, it’s even better if you do them 3 to 4 times.
Phase 1: Early Motion (Weeks 0-3 Post-OP)
This is the period of elbow fracture rehabilitation exercises immediately after surgery/ cast immobilisation. To reduce the complications, one should start physiotherapy immediately post-operative.
With the splint on, we have to start exercises for the wrist and shoulder joints. Remember, we have to avoid active elbow extension 6 weeks post-operative. So, let us begin with wrist joint range of motion exercises.
Exercise 1: Active Wrist Flexion and Extension
Wrist exercises help prevent wrist joint stiffness and improve blood circulation around your forearm – all while maintaining forearm muscle tone.
- To start, you’ll need a sling to support your forearm.
- Once the sling is in place, you can begin the exercise by moving your wrist joint up and down, as shown in the figure. This movement is gentle and easy to do, but it can significantly benefit your wrist health.
- Experts recommend doing a minimum of 20 repetitions of this exercise in each session, but you can do more if you like. The great thing about this exercise is that you can do it whenever you find the time—ideally while sitting and watching television.
Exercise 2: Wrist Circles (Circumduction)

The next exercise to help maintain wrist flexibility is called wrist circumduction. This exercise is specifically designed to prevent wrist stiffness and can be done with your forearm still in a sling.
- To begin, rotate your wrist as shown in the figure provided.
- Rotate your wrist clockwise and anti-clockwise. This will help increase your range of motion and prevent stiffness from setting in.
It’s important to note that you should do as many repetitions as possible while still being comfortable. Doing too much too soon can lead to discomfort or even injury.
So, start slow and gradually increase the number of repetitions as your wrist strength improves.
Exercise 3: Early Grip Strengthening with a Ball
It is quite common to experience grip weakness after being immobilised for a long time. This can greatly affect our day-to-day activities, especially when it comes to holding objects such as a glass of water.
Therefore, it is crucial to include exercises that focus on strengthening the grip in your rehabilitation program.
One simple yet effective exercise that can be done at home is squeezing a gel ball or a sponge ball with your affected hand. This exercise not only helps to improve grip strength but also aids in increasing blood circulation, which can promote fracture healing.
- To begin this exercise, choose a gel ball or sponge ball that is comfortable to grip and fits well in your hand.
- Start by holding the ball in your affected hand and squeezing it as tightly as possible. Hold the squeeze for a few seconds, then release. Repeat this process for as many repetitions as possible.
- As you continue to do this exercise, you may find that your grip strength improves over time.
Exercise 4: Gentle Shoulder Pendulums (Abduction/Adduction)
If you are experiencing stiffness in your shoulder joint, it is important to prioritise exercising it to improve your condition. One effective exercise can be done in a standing position.
- To begin, stand comfortably and support the affected forearm on the opposite hand. This will help to stabilize the joint and ensure that you are targeting the correct area.
- Once you are in position, slowly move your shoulder right and left. You can do this by gently swinging your arm back and forth while keeping your elbow bent.
- It is important to take your time and move slowly to avoid any sudden jerks or movements that could cause further discomfort.
- You should aim to do this exercise for 15 to 20 repetitions in each session.
Exercise 5: Assisted Shoulder Flexion

This exercise is designed to help increase the range of motion of the shoulder, which can be significantly limited following an injury.
- To perform this exercise, begin by supporting your forearm with a sling.
- Then, hold your wrist with your other hand, which will support your forearm.
- Now, with the support of your other hand, slowly move your shoulder forward.
- Flex the shoulder to the point where you feel comfortable, and then slowly bring it back down.
- Repeat this movement a minimum of 15 to 20 times in a session.
Phase 2: Increasing Mobility (Weeks 3-6 Post-OP)
After the third and sixth weeks of your recovery from a wrist or shoulder injury, you may be allowed to remove the splint during exercise. However, it’s important to note that you must still be cautious and take things slowly.
In order to make sure you’re progressing safely and effectively, you should repeat all of the exercises we’ve discussed for the wrist and shoulder joints.
In terms of increasing the difficulty of the exercises, you can start to gradually increase the number of repetitions you do. This will help to build up your strength and flexibility over time.
Phase 3: Restoring Elbow Motion (Weeks 6-10)
By the 6th week, the posterior elbow brace has been removed, and now we should focus on elbow range of motion exercises and strengthening exercises.
Exercise 6: Active Elbow Flexion and Extension

When it comes to joint pain, the elbow joint is often the most affected. If you’re experiencing elbow pain, restoring elbow flexion and extension motion should be your top priority.
- To get started, find a comfortable seat in front of a table and place your affected sidearm on the table.
- Make sure your arms are flat on the table to create a stable base of support for performing elbow exercises.
- Next, straighten your elbow as much as possible, then slowly and smoothly bend it to its maximum.
- Move your elbow back and forth between extension and flexion, moving slowly and carefully to avoid any additional pain or discomfort.
- Repeat this exercise at least 20 to 30 times in a single session, twice daily. Regularly performing this simple exercise can help improve the range of motion in your elbow joint and reduce pain and discomfort.
Exercise 7: Forearm Rotation (Pronation/Supination) with a Cane

Forearm pronation and supination are important elbow joint motions that can help improve flexibility and strength in the forearm muscles.
To perform this exercise, we’ll start with a different position than the previous exercise. This time, we’ll stabilize the forearm by keeping it flat on a table as shown in the figure.
- To begin, make sure your forearm is flat on the table, with your palm facing down.
- From here, rotate your forearm clockwise and then anticlockwise. When you turn it clockwise, it is called supination; when you turn it anticlockwise, it is called forearm pronation.
- At first, you can do this exercise freely without holding anything.
- However, as you progress, I recommend grabbing a cane or a lightweight rod to make the exercise more effective. A cane will create more momentum, which will help you move your forearm in both directions with greater ease.
- As you hold the cane, move your forearm in a circular motion, rotating it clockwise and anticlockwise. Make sure to move slowly and deliberately, focusing on keeping your forearm stable and maintaining a smooth, controlled motion.
- Repeat this exercise for several reps, aiming to increase the number of reps as you progress.
Exercise 8: Isolated Wrist Flexion and Extension

- To begin, start by assuming the same starting position as the previous exercise.
- Hold the upper forearm just below the wrist joint with your other hand to make it stable while doing the rest of the exercise.
- In this position, bend your wrist forward and backwards. While doing this movement, make sure to take the wrist to the end range till the pain allows.
- Repeat this exercise at least 20 to 30 times in a single session and twice daily. We recommend you repeat this exercise as much as you can.
Exercise 9: Isolated Wrist Circles

To improve the flexibility and mobility of your wrist joint, you can perform a simple yet effective exercise that involves rotating your wrist clockwise and anticlockwise.
This exercise is similar to the wrist flexion and extension exercises and can be performed in the same starting position.
- To begin, sit in a comfortable position with your arm extended in front of you and your palm facing down. Make a fist with your hand and keep your forearm still.
- Then, rotate your wrist joint clockwise as far as possible without causing pain or discomfort.
- Repeat this movement 15 to 20 times.
- After completing the clockwise rotations, switch to anticlockwise rotations. Rotate your wrist joint in the opposite direction, again making sure not to overextend or cause pain.
- You can also perform this movement 15 to 20 times, repeating it as many times as you feel comfortable.
Exercise 10: Active Shoulder Elevation

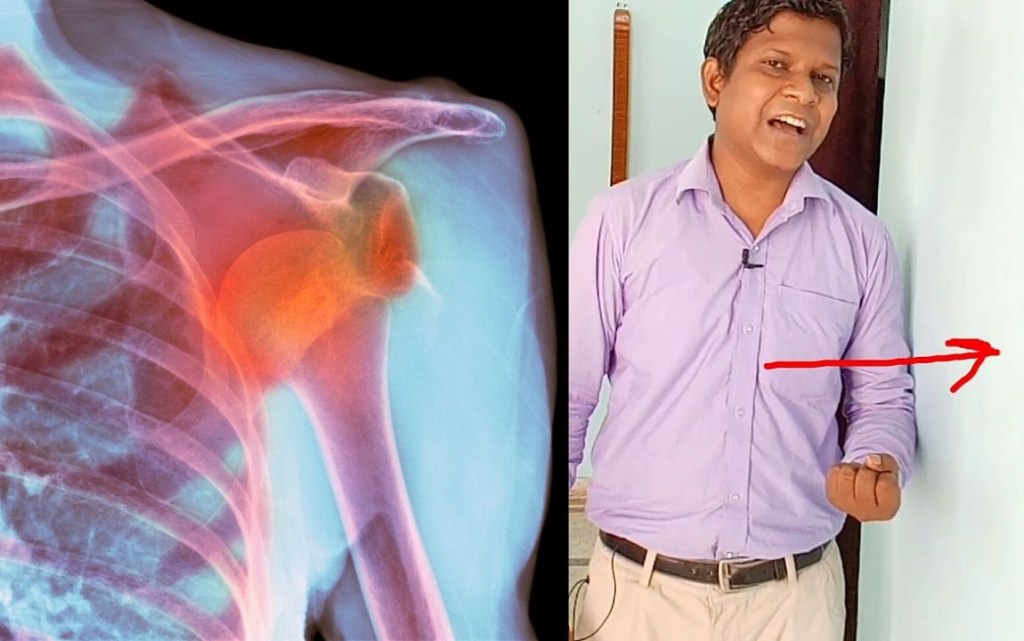
Shoulder joint stiffness is a common problem that is often ignored. As a physiotherapist with 15 years of experience, I have seen many cases where shoulder joint stiffness has become a serious issue for patients.
Research shows that for every additional week of immobilisation, there is an increase in shoulder pain and disability. That’s why it’s important to take care of this issue as soon as possible to prevent further complications2.
- To perform this exercise, simply grasp your hand and elevate it to the maximum point where you can take it.
- Hold this position for a few seconds, then lower your hand.
- Repeat this process 15 to 20 times in a single session, and aim to do this exercise twice daily for the best results.
Exercise 11: Shoulder Range of Motion with a Pulley

Shoulder elevation exercises are great for improving the shoulder range of motion. One particularly effective type is using a rope and pulley.
- To get started, you’ll need a rope and a pulley to fix to the roof or any other elevated position that is convenient for you.
- Once you have your equipment set up, it’s time to start the exercise. Begin by holding both ends of the rope with each hand. Then, pull the rope to slide it through the pulley.
- This motion will create an alternate elevation off the right and left shoulder joints, helping you to improve your shoulder range of motion.
- To get the most out of this exercise, repeat it 20 to 30 times in a single session twice daily.
Exercise 12: Gentle Elbow Stretching with Overpressure
As we continue with this exercise, it’s important to focus on regaining the full range of motion in your elbow joint. One way to do this is by incorporating a slight overpressure at the end range of elbow extension and flexion.
This can be achieved by using your opposite hand to gently push your elbow joint just past its comfortable range of motion.
This technique produces a stretching effect, which can help improve flexibility and range of motion in both the flexor and extensor muscles of your elbow joint. By gradually increasing the amount of pressure applied, you can gradually work towards increasing your range of motion without causing any discomfort or pain.
Exercise 13: Wrist Stretching for Flexors and Extensors
In this exercise, we will use our opposite hand to slightly put pressure at the end range of wrist flexion and extension.
This exercise is particularly effective in stretching the tight flexors and extensors of the elbow joint, which can often become stiff from everyday activities such as typing or writing.
- To perform this exercise, start by extending your arm out in front of you, with your palm facing upwards.
- With your opposite hand, gently grasp your fingers and apply slight pressure to push your wrist into extension.
- Hold this position for 10-15 seconds before releasing.
- Next, flip your palm downwards and repeat the same process, applying pressure to push your wrist into flexion. Remember to keep the pressure gentle and gradual to avoid causing any discomfort or injury.
Exercise 14: Progressive Grip Strengthening

For this, you can use a silicone gel ball. You simply need to hold the gel ball and squeeze it as many times as you can. This is a very simple yet effective exercise to gain grip strength, which can be done as many times as possible.

- Dual-Shape Design: Includes 2 blue silicone grip balls in round (1.97″) and elliptical (2.28×1.65″) shapes for versatile…
- Premium Silicone & Gel Material: Premium and safe silicone exterior with gel-filled core offers soft, elastic texture fo…
- Targeted Shapes: Round ball offers uniform resistance for full-hand strength and stress relief; elliptical ball features…
Phase 4: Strengthening & Return to Activity (Weeks 10-12+)
Gradually return to light activity and exercise. No further activity restrictions after 12 weeks
Exercise 15: Weighted Elbow Stretch and Strengthener

For this exercise, you’ll need a set of dumbbells weighing 1.5 to 2 kg. It’s important to note that this exercise is recommended only if you have gained sufficient grip strength to hold the dumbbell firmly.
- To begin, stand straight and hold the dumbbell with the hand on the affected side.
- Make sure to hold it in a comfortable position and allow the weight of the dumbbell to exert a gentle stretch on the elbow joint.
- Hold this position for 1 to 5 minutes, depending on your convenience and comfort level.
- As you become more comfortable with the exercise, you can gradually increase the weight of the dumbbell up to 5 kg.
- It’s important to maintain proper posture while performing this exercise, so make sure to keep your back straight and shoulders relaxed.
Elbow fracture rehabilitation exercise ebook
You can also download elbow fracture home exercise programe in pdf, print it and keep it handy for your reference. It contains all the exercises we learned here demonstrated by clear images.
Conclusion: Your Path to Full Recovery
For the best result, perform all these exercises for at least 2 months. These exercises are effective; however, they are not a replacement for an actual physiotherapy session.
In addition to these exercises, I strongly recommend getting physiotherapy sessions for effectiveness and quick improvement.
Keep reading: How do you loosen tight shoulders?
FAQ
The author is a physiotherapist who has been practising for the last 17 years. He holds a Bachelor's in Physiotherapy (BPT) from SVNIRTAR (Swami Vivekananda National Institute of Rehabilitation and Research), one of the prestigious physiotherapy schools in India.
Whatever he learns dealing with his patient, he shares it with the world through blogs and e-books. He also owns a YouTube channel, "Sunit Physiotherapist" with over 8 lakh active subscribers. Here, he shares everything he gets to learn serving the patient.


very informative
Pingback: How to Loosen Tight Shoulders? 7 Exercises fix tight shoulders - Physiosunit