Last Updated on January 23, 2026 by Sunit. S. Ekka
Key Takeaways:
- ✅ Start with gentle stretches before strength exercises.
- ✅ Perform 2–3 sets daily for best results.
- ✅ Stop if pain exceeds mild discomfort.
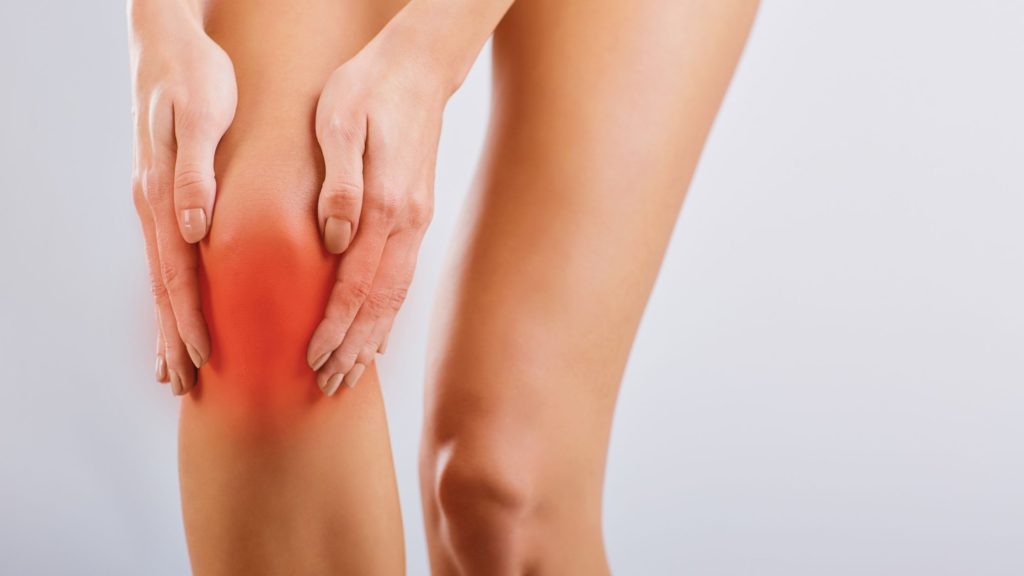
If you’ve recently suffered a wrist fracture, your surgeon may choose to fix it using a screw plate or realign it, followed by immobilization in a plaster cast. However, a new set of challenges may arise when the cast comes off.
With stiffness, weakness, and swelling, your wrist joint motion can be restricted, making even the simplest tasks a struggle.
While seeking guidance from a physiotherapist is ideal, there are steps you can take from the comfort of your home to speed up your recovery.
In this article, we’ll discuss some effective wrist fracture rehabilitation exercises that can help you regain full function and get back to your daily routine as quickly and safely as possible.
Easy exercises to regain Wrist Mobility after Plaster Cast Removal
After removing your plaster cast, you may notice stiffness and restricted movement in your wrist and finger joints. We aim to eliminate stiffness and improve the strength of your wrist joint.
Your wrist joint can perform four main movements: bending forward, bending backwards, bending towards the thumb (radial deviation), and bending towards the little finger (ulnar deviation).
These movements together are known as circumduction, and our exercises will address each aspect to promote better mobility.
We will start with stretching exercises to release the soft tissue stiffness around the wrist joint. So, let us start with mild wrist stretching.
1) Early-Stage Rehab: Gentle Wrist Stretches After Cast Removal

After removing the brace or plaster cast, both flexion and extension motions of the wrist are restricted. We have to stretch both the flexor muscle and the extensor muscle. Because it is still painful, we need to start slowly.
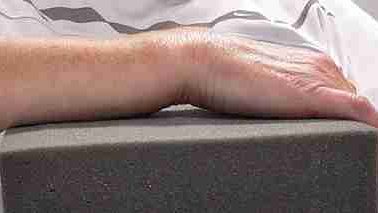
- To perform the wrist flexion stretch, start by sitting in a comfortable chair with your feet flat on the floor.
- Place your affected arm on a table or any other flat surface in front of you, with your elbow 90 degrees elevated, as shown in the figure.
- Now, use your other hand to gently grasp your affected wrist and guide it into a forward flexion position until you feel a light stretch in your wrist and forearm muscles.
- Hold this stretch for about 30 seconds to 1 minute while maintaining a relaxed breathing pattern.
- Next, slowly release the stretch and return your wrist to the starting position.
- Repeat this motion 2-3 times in a row, taking a short break between each repetition.
- For the wrist extension stretch, use your other hand to gently grasp your fingers and pull your hand backwards, towards your forearm, until you feel a mild stretch in your wrist and forearm muscles.
- Hold this stretch for 30 seconds to 1 minute, while maintaining a relaxed breathing pattern. Slowly release the stretch and bring your wrist back to the starting position.
- Repeat this motion for 2-3 times in a row, taking a short break in between each repetition.
- Remember to perform these stretching exercises regularly, at least twice a day, to help alleviate tightness and stiffness in your wrist and forearm muscles.
2) Wrist Flexor Stretch: Relieve Tightness Safely

As you regain slight mobility in your wrist, you should progress to more vigorous stretching. So, our next stretching exercise is targeted at the wrist flexor muscle.
- To perform the wrist flexor stretching exercise, start by standing in front of a sturdy table or desk that is at a comfortable height for you. Place your palm flat on the table.
- Next, use your other hand to press down on the top of your hand just below your wrist to stabilise it. This will prevent your hand from moving as you perform the stretch.
- Slowly lift your wrist while keeping your palm flat on the table until you feel a stretch in your flexor muscles. Move slowly and smoothly throughout the exercise without jerking or bouncing.
- Hold this stretched position for 30 seconds, breathing deeply and evenly throughout. You should feel a gentle stretch in your wrist, but stop immediately if you feel any sharp or intense pain.
- After 30 seconds, slowly lower your wrist to the starting position and repeat the exercise for 3 to 4 repetitions in a session.
- Perform this exercise daily to improve flexibility and mobility in your wrist, which can be particularly beneficial for individuals who use their hands frequently in work or daily activities.
3) Passive Ulnar/Radial Deviation: Restore Side-to-Side Motion

We should not ignore the wrist ulnar and radial deviation movement.
- To perform this exercise, you need to first place your forearm and hand flat on a table with your palm facing downwards. Make sure your arm is relaxed and your fingers are straight.
- Next, take the help of your other hand, as you can see in the figure. Use your other hand to grab your affected hand’s fingers and wrist gently.
- Now, move your wrist towards your thumb (radial deviation) and your little finger (ulnar deviation). You should feel a stretch in your wrist and hand. You may also experience mild pain, but don’t worry, this is normal. Try to ignore the pain and focus on the movement so that stiffness does not occur in the future.
- Do as much as you can tolerate, but a minimum of 10 to 15 repetitions is recommended in a session.
Also Read: Easy Hand Blast Injury Physiotherapy Exercise to Get back to job early
4) Active Wrist Flexion & Extension: Regain Control

After successfully performing passive wrist flexion and extension exercises without experiencing any pain, you can progress to active wrist flexion and extension exercises.
As the name implies, you must perform these exercises actively, without any external assistance.
- For active wrist flexion and extension, raise your arms in front of you at shoulder level, as in the figure.
- Then, perform wrist flexion and extension.
- It would be best if you aimed to perform 10 to 15 sets of wrist flexion and extension exercises in a single session, and you may do as many repetitions as possible.
5) Active Ulnar/Radial Deviation: Improve Side Mobility
When performing wrist radial and ulnar deviation motion exercises, it’s important to do them actively without the help of the other hand or any external assistance. To do this:
- Start by positioning your forearm straight in front of yourself, parallel to the ground.
- Now, actively perform wrist ulnar and radial deviation motions (refer to the image above). This means moving your wrist from side to side in a controlled manner without relying on external support.
- Repeat this motion 10 to 15 times in a single session, maintaining proper form and control throughout.
- The more you practice this exercise, the better it will be for your wrist strength, flexibility, and overall health.
6) Finger & Thumb Mobilization: Combat Stiffness

Now let’s move on to the fingers, which are also getting stiff.
- So, to release the stiff joints of the finger, take the help of the other hand and bend your fingers.
- Start with the knuckle joint and then press the rest of the finger joints into flexion.
- You have to take special care of your thumb, press the thumb into the bending position, and you should also move the small joints of the thumb.
7) Grip Strengthening: Squeeze Ball Exercises

One of my favourite exercises to strengthen my fingers is using a grip-strengthening silicone gel ball. To perform this exercise:
- Grasp the ball and squeeze it.
- You can do this exercise as often as you like during your free time. The more you do it, the better it will be for you.
- This exercise has two benefits: firstly, it helps to release finger stiffness, and secondly, it gradually strengthens your grip if you have any weakness.
For grip exercises, I recommend soft silicone balls like these Squeeze Balls – they’re gentle on healing joints but provide progressive resistance.

- 🥚MAKE EXERCISE SIMPLE – These colorful stress relief balls in three levels of progression (15kg- 25kg- 30 kg resistance)…
- 🥚REHABILITATION & PREVENTION – Your hands probably will get quite sore from using a keyboard and mouse all day and exerc…
- 🥚USE IT ANYWHERE ANYTIME – Our stress relief toys set has a small size and charming egg shape looking. This is a really …
8) Elbow Stretching: Prevent Joint Stiffness

Let’s now focus on the elbow joint. Stiffness in the elbow joint is not a common issue, and not many people experience it. However, after removing the cast, the elbow joint is not completely straight. For this issue:
- Sit in a chair with a table before you.
- Then, stabilise your arm on the table and press your forearm with the other hand so that it straightens.
- Do this exercise as much as possible and hold it for a minute.
- Repeat this exercise at least two to three times each session whenever you have free time.
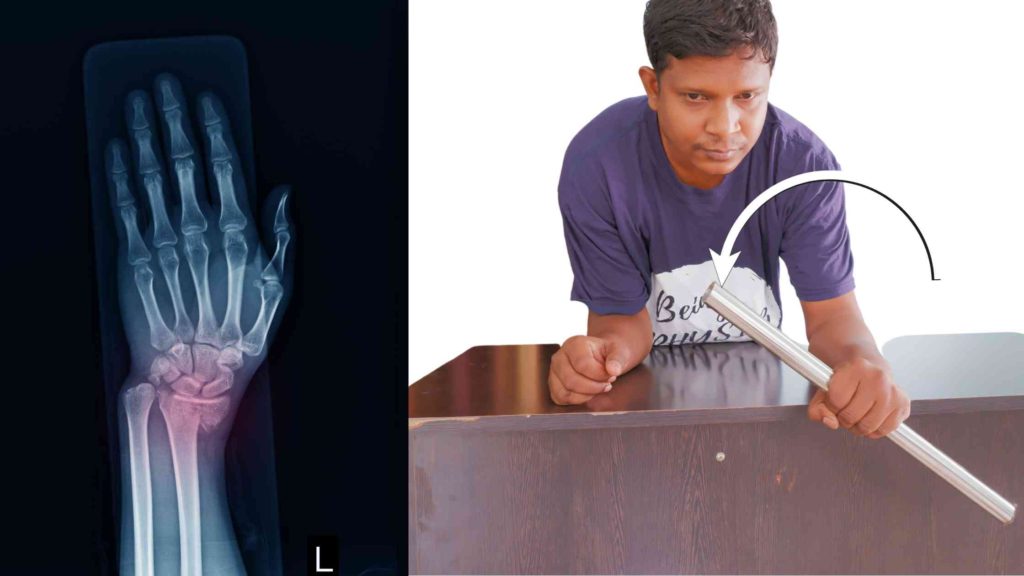
9) Forearm Pronation/Supination: Regain Rotation

You may also experience stiffness in your elbow joint, affecting your forearm’s rotation ability. To address this:
- You can stabilize your arm on the edge of a table and rotate your forearm back and forth.
- As your finger movement and grip strength improve, you can hold a bar or stick and repeat the forearm rotations while stabilising your forearm on the edge of a table.
- There is no specific number of repetitions to aim for, so do as many as you feel comfortable with.
When to Progress: Advanced Wrist Rehab & Resistance Training
As you feel that you have achieved significant strength and motion in your wrist joint, you can progress with wrist resistance exercises. One of the best ways is to progress with theraband wrist exercises.
A theraband or resistance band is a band made of rubber that gives sufficient resistance.

- Stretches, tones & conditions all major muscle groups, perfect for those with latex allergies or sensitivities
- Simple & easy to use product for upper & lower body exercises that can be performed anywhere, is ideal for conditioning …
- The Non-Latex Resistance Band increases both strength & flexibility in a subtle & natural manner
While these exercises are important, they are not a substitute for professional physiotherapy consultation. Working closely with your physiotherapist for a personalised plan and proper guidance is essential.
Have you tried these exercises? Share your progress in the comments below.
Keep Reading: Easy Exercise Treatment for Scaphoid Fracture to Get Back Early to Work
FAQs: Wrist Fracture Rehabilitation
The author is a physiotherapist who has been practising for the last 17 years. He holds a Bachelor's in Physiotherapy (BPT) from SVNIRTAR (Swami Vivekananda National Institute of Rehabilitation and Research), one of the prestigious physiotherapy schools in India.
Whatever he learns dealing with his patient, he shares it with the world through blogs and e-books. He also owns a YouTube channel, "Sunit Physiotherapist" with over 8 lakh active subscribers. Here, he shares everything he gets to learn serving the patient.