
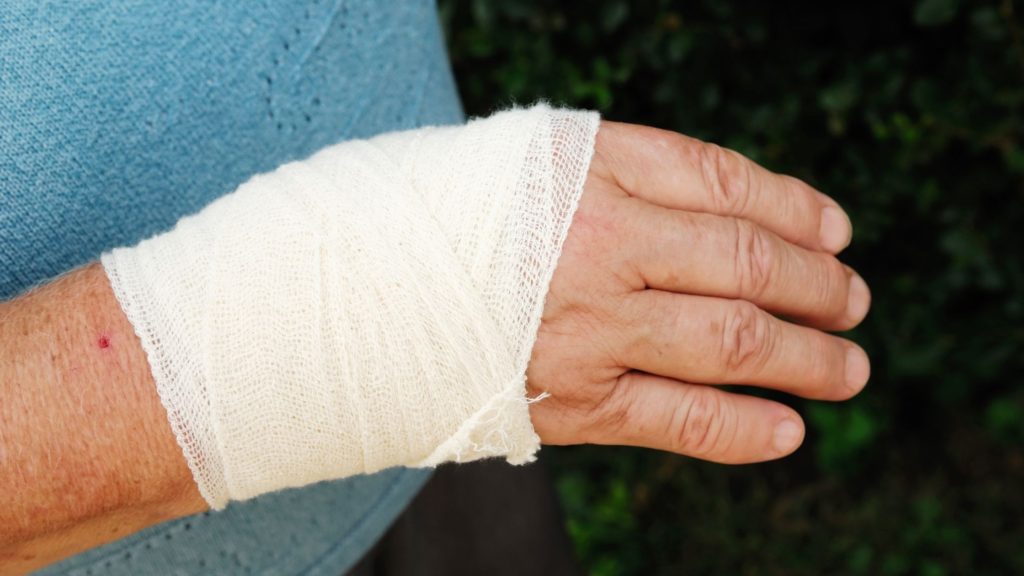
After plastic surgery reconstruction of a hand blast injury, the biggest challenge is regaining wrist and finger range of motion. Hand blast injury physiotherapy plays a crucial role in helping patients return to work and daily function after firecracker or bomb-related trauma.
This comprehensive guide covers everything related to hand injury due to blast, with special focus on a practical 3-phase physiotherapy treatment and exercise plan. You will learn how to control swelling, manage scar tissue, restore movement, and progress safely toward functional recovery.
- Hand Blast Injury: A Case Study and Common Causes
- Rehabilitation exercise after blast injury of the hand
- Phase 1: Acute Phase (Pain and Swelling Management)
- Phase 2: Sub-Acute Phase (Regaining Motion and Strength)
- Exercise 1: Wrist Flexion and Extension
- Exercise 2: Radial and Ulnar Deviation of the Wrist
- Exercise 3: Finger Range of Motion (ROM) Exercises
- Exercise 4: Wrist Stretches for Flexor and Extensor Muscles
- Scar Tissue Management: Softening and Mobilization
- Progressive Strengthening Exercises for Grip and Forearm Muscles
- Pain
- Using Contrast Bath Therapy to Reduce Swelling
- Phase 3: Rehabilitation Phase (Returning to Work and Function)
- Key Takeaways for Successful Recovery
- FAQ
Hand Blast Injury: A Case Study and Common Causes
Key Clinical Findings on Hand Blast Injuries :
>98% involve the thumb muscles (thenar) and 1st web space.
~60% involve a dislocation of the thumb’s CMC joint.
~80% of injuries involve the dominant hand.
The most common causes are firecrackers, homemade, and bottle bombs.
Stiffness is a major challenge, making post-operative physiotherapy critical.
The research has revealed the most common causes of blast injuries are firecrackers, homemade bombs and bottle bombs. The involvement of hands in such injuries is due predominantly to:
- Accidental blast during the hurling of a bomb, and,
- The injury sustained when a person tries to shield himself from a bomb being hurled at him with his hands1.
The most common injury pattern is 1:
- Damage to the muscles in the space between the thumb and index finger.
- The thumb joint can dislocate towards the back, and injuries to the bones in the hand near the thumb might also occur. When the base of the first metacarpal is involved, it can resemble a Bennett fracture pattern.
Before proceeding to the exercise, let us start with the case of a 28-year-old male I dealt with at our physiotherapy centre.
A 28-year-old male with a postoperative case of hand blast injury came to our department for physiotherapy. Here’s the history of his injury. When a firecracker accidentally blasted into his hand, he was having fun with crackers. Immediately, He was shifted to the local hospital by his friends and family members. The doctors ruled out any finger or wrist bone fracture; they performed primary debridement by primary closure.
It was a blast injury of the hand when a firecracker blasted on his hand. An X-ray ruled out any involvement in the bone fracture. There was only involvement of the soft tissue. After stitch removal, he was referred to physiotherapy for postoperative physiotherapy.
Rehabilitation exercise after blast injury of the hand
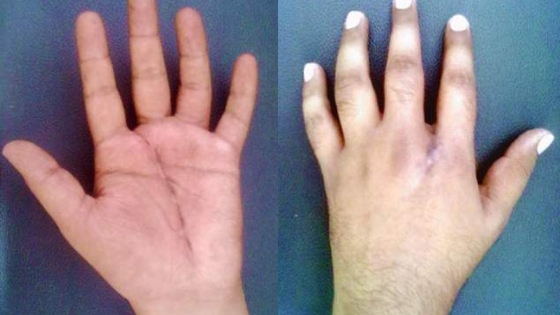
Stiffness in wrist and finger joints is a very common issue after surgical treatment. For this, the range-of-motion exercise program should be started as early as possible. Recent evidence comparing early versus delayed rehabilitation after complex post-traumatic hand injuries shows that early intervention is associated with faster resolution of oedema, quicker gains in mobility, and earlier improvement in grip strength3. Many of the same principles used in wrist fracture rehabilitation exercises also apply here.
Post-operatively, hand blast injury rehabilitation can be categorised into three phases.
- Acute Phase
- Sub-acute Phase
- Rehabilitative Phase.
The degree and intensity of exercises depend on this phase. So, let’s start with the acute phase.
Phase 1: Acute Phase (Pain and Swelling Management)
The acute phase is the initial stage after surgery and is characterised by swelling and pain. Physiotherapy’s aim during this phase is to control swelling (oedema) and manage pain.
How to Control Swelling and Oedema After Hand Surgery
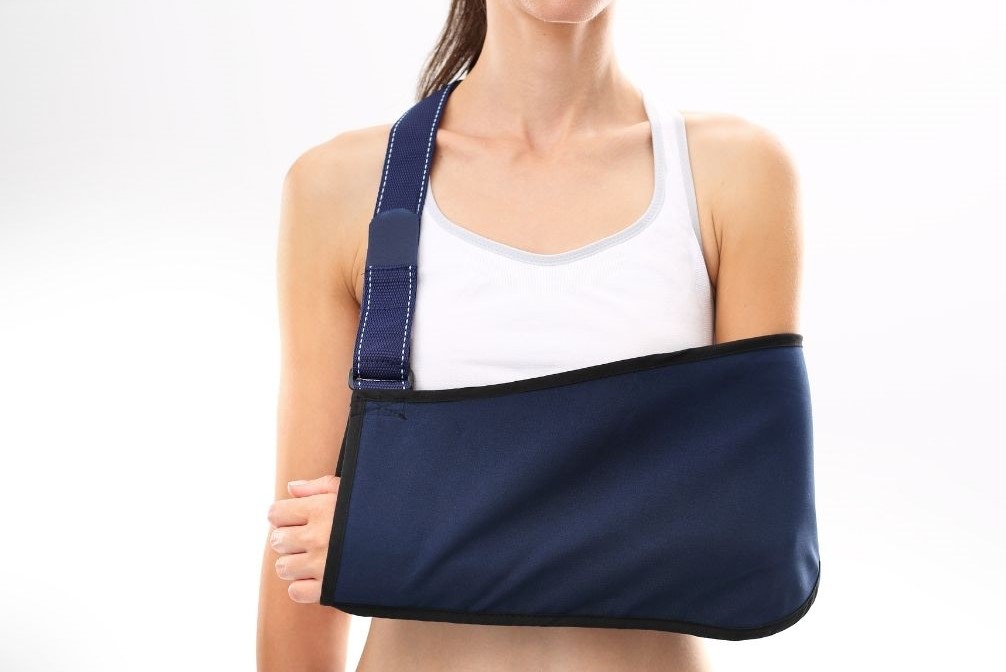
a) Elevation: keep the hand in an elevated position while sleeping by using a pillow (see figure)
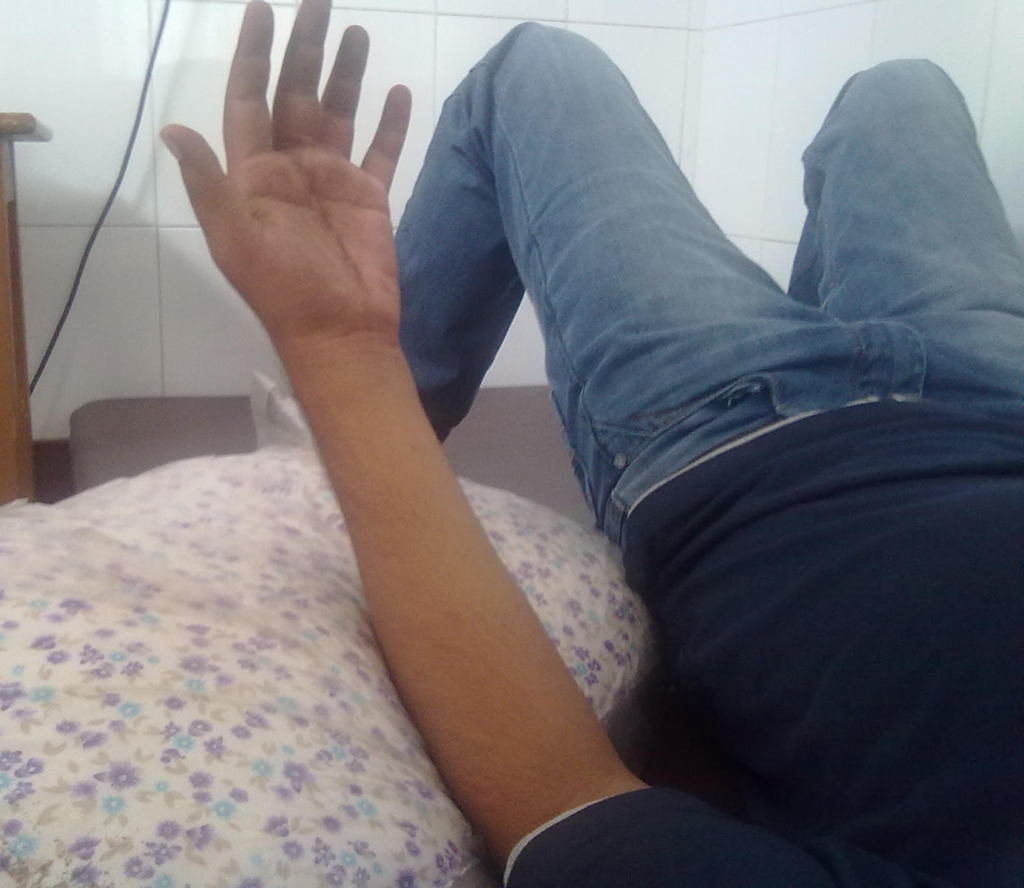
b) Movement: In an elevated position, slight finger and wrist movement is started within a pain-free range.
c) Compression: Using crepe bandages or compressive garments, optimum pressure is applied.
Physiotherapy Modalities for Pain Relief
- Heat therapy.
- Ultrasonic therapy: Its micro-massage effect is beneficial for both swelling and pain.
- Interferential therapy benefits pain because of its stimulatory effect, which contracts the muscle and helps relieve swelling.
Early Muscle Strengthening with Electrical Stimulation
During the acute phase, the slightest movement is painful. So, for muscle strengthening, Faradic Stimulation is given. It stimulates the muscle, which contracts and relaxes the muscle like normal muscles. Wrist extensors and finger extensors are mainly concentrated.
Phase 2: Sub-Acute Phase (Regaining Motion and Strength)
The sub-acute phase is characterised by reduced acute pain and swelling. The surgical wound is healed, and the surgical scar mark is left over. During this phase, the aim of physiotherapy would be
- Gaining range of motion of wrist and finger joints.
- Softening of scar mark.
- Strengthening of muscles around the wrist and fingers.
- Take care of the swelling.
Exercise 1: Wrist Flexion and Extension
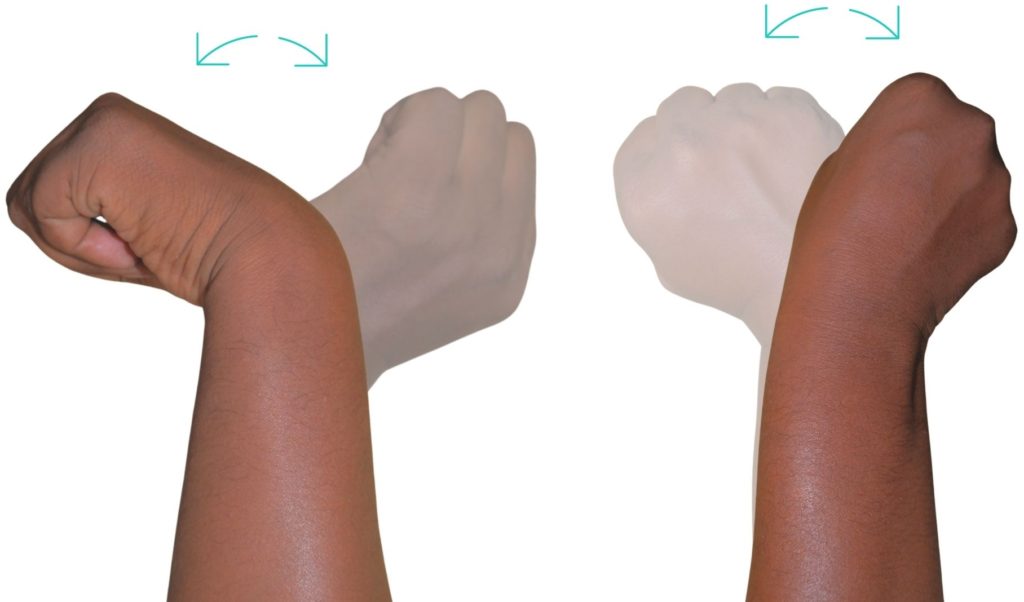
Stabilise your forearm on a table or any flat surface. To perform the flexion-extension exercise,
- Start by moving your wrist into flexion. For this, move your wrist joint forward, as if you were trying to touch the inside of your wrist to your forearm, and
- Then, perform wrist extension. To do this, move your hand backwards as if you were trying to touch the back of your hand to your forearm.
- Perform this alternate flexion and extension smoothly and slowly.
- Repeat this for a minimum of 20 to 30 times in a session.
Exercise 2: Radial and Ulnar Deviation of the Wrist
To perform the radial-ulnar deviation exercise:
- Start by extending your arm in front of you with your palm facing down. Then, move your wrist sideways towards your thumb as far as is comfortable. This motion is called radial deviation.
- Then, slowly move your wrist sideways towards your little finger.
- Perform this alternate radial and ulnar deviation slowly and smoothly.
- Repeat this movement at least 20 to 30 times in a session.
Exercise 3: Finger Range of Motion (ROM) Exercises
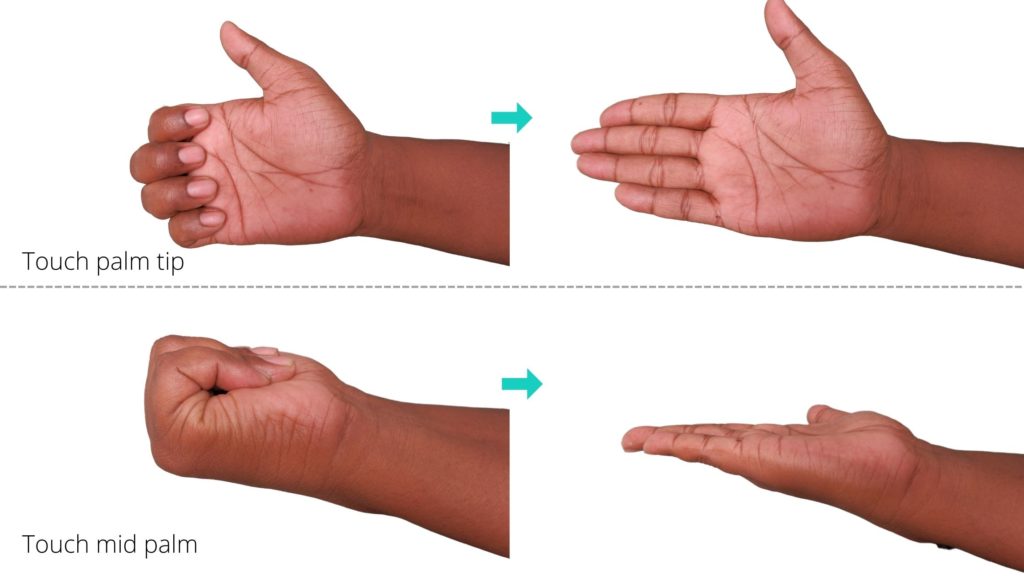
This exercise is aimed at gaining the range of motion of the small joints of the finger. Observe the steps on the figure and follow the steps below:
- Step 1: Start by spreading your fingers as wide as possible.
- Step 2: Bend your fingers so your fingertips touch your palm’s top.
- Step 3: Straighten your fingers.
- Step 4: Bend your fingers again to touch the middle of your palm.
- Step 5: Open your fingers wide.
- Step 6: Bring your fingertips to touch the bottom of your palm.
- Step 7: Bring your thumb to touch each fingertip, one at a time.
Bring your thumb to touch different places on your palm. Do 3 sets twice a day.
Exercise 4: Wrist Stretches for Flexor and Extensor Muscles
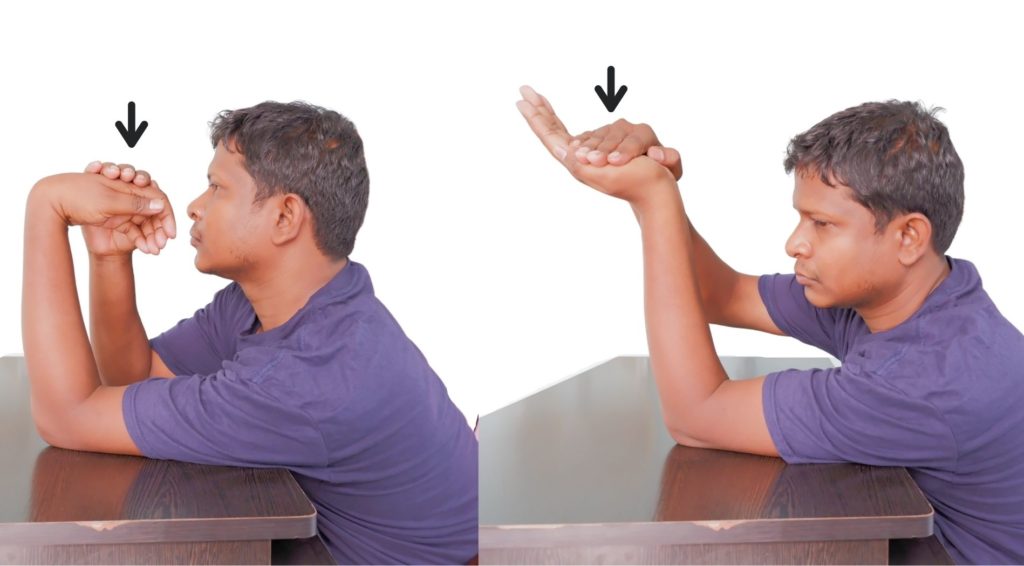
Our next exercise is meant to stretch the stiff and tight muscles of the wrist joint. First, try to learn the exercise, and then you can increase the intensity of the stretch.
- Start by placing your arm on the table in front of you with your forearm vertical.
- Use your opposite hand to gently press down on the back of the hand to stretch the wrist flexors.
- Hold this position for at least 30 seconds, feeling a gentle stretch in the forearm.
- Then, switch to the other side and repeat the exercise, this time with your palm facing up and your fingers pointing towards the floor.
- Gently press down on the back of the hand to stretch the wrist extensors, and hold for at least 30 seconds.
- Repeat this for 3 to 4 times in a session.
Scar Tissue Management: Softening and Mobilization
A scar mark adheres to the lower structure, and when the scar is not soft, any stretching causes pain. Both factors together restrict joint movement. Therefore, softening scars is so important. Your physiotherapist will apply the following procedure for it.
- DTMF (Deep Transverse Friction Massage) over the scar mark.
- Ultrasonic Therapy.
These techniques aim to prevent the scar from becoming a contracture. In severe cases where the scar remains tight and restricts movement, a doctor may recommend interventions like serial casting or surgical evaluation to release the contracture2. Understanding how joint restriction develops and can be prevented helps explain why early scar care is so important.
This involves applying a cast to hold the joint at its maximally stretched position. The cast is changed every few days to progressively increase the stretch, breaking down the scar tissue.
It’s a non-invasive option that can yield significant improvements in a short time, even in adults.
Progressive Strengthening Exercises for Grip and Forearm Muscles
Once a good range of motion is achieved, the focus shifts to rebuilding the grip strength. Grip strength is necessary for daily tasks and returning to work.
There are several different ways you can perform grip strengthening exercises:
Rice Digging: Place your hand into a large bucket of uncooked rice. Open your hand against the resistance of the rice, then close it into a fist. This provides gentle, all-around resistance.
Stress Ball or Soft Putty: Squeeze a soft stress ball or therapy putty. Hold the squeeze for 3-5 seconds and release slowly. Repeat 10-15 times.


Towel Wringing: Hold a hand towel with both hands and practice wringing out water in both clockwise and counter-clockwise directions. This simultaneously strengthens grip and forearm muscles.
Pain
- Interferential Therapy.
- Heat therapy.
Using Contrast Bath Therapy to Reduce Swelling
A contrast bath or alternate cold and hot bath effectively manages hand and finger swelling. It involves dipping hands alternately in cold and hot water.
Do the contrast bath twice daily, and you will find instant relief from swelling and pain.
Phase 3: Rehabilitation Phase (Returning to Work and Function)
In this final phase the focus shifts from basic range of motion and strength to real-life function. The goal is to prepare the patient to return to work, hobbies and daily activities with confidence. Recent case series on firework-related hand blast injuries also highlight the importance of multidisciplinary rehabilitation, including occupational therapy and psychosocial support, in optimising long-term functional and psychological recovery4.
All exercises from the sub-acute phase continue, but they are now performed more aggressively and with higher resistance. In addition, specific functional and fine-motor drills are introduced:
- Fine motor & dexterity work – thumb opposition, picking up small objects, buttoning, writing, using tools or utensils.
- Progressive grip & pinch strengthening – therapy putty of increasing resistance, graded stress balls, and simulated work tasks.
- Work-hardening / simulated tasks – practising the specific movements required by the patient’s job (e.g., gripping tools, lifting, typing, or handling materials).
- Endurance training – longer sessions of repetitive functional activities to build stamina.
Criteria for progressing or returning to heavier activity usually include: near-full pain-free range of motion, controlled swelling, adequate grip strength relative to the uninjured side, and the ability to perform key work or daily tasks without significant compensation. A physiotherapist or occupational therapist should guide the final stages, especially when heavy manual work or high-risk activities are involved.
Psychosocial aspects also matter. Frustration, fear of re-injury and changes in body image are common after a visible hand injury. Open communication with the therapy team and realistic goal-setting help maintain motivation throughout recovery.
Key Takeaways for Successful Recovery
- Start controlled movement as early as the surgeon allows – early motion is the best defence against stiffness.
- Prioritise swelling control (elevation, gentle movement, compression, contrast baths) in the first weeks.
- Treat the scar actively once the wound has healed – soft, mobile scars allow better joint motion.
- Progress strengthening only when range of motion and swelling are under control.
- Move from isolated exercises to real functional tasks in Phase 3 so the hand becomes useful again in daily life and work.
- Always follow the specific advice of your surgeon and hand therapist – every blast injury is unique.
FAQ

The author is a physiotherapist who has been practising for the last 17 years. He holds a Bachelor's in Physiotherapy (BPT) from SVNIRTAR (Swami Vivekananda National Institute of Rehabilitation and Research), one of the prestigious physiotherapy schools in India.
Whatever he learns dealing with his patient, he shares it with the world through blogs and e-books. He also owns a YouTube channel, "Sunit Physiotherapist" with over 8 lakh active subscribers. Here, he shares everything he gets to learn serving the patient.
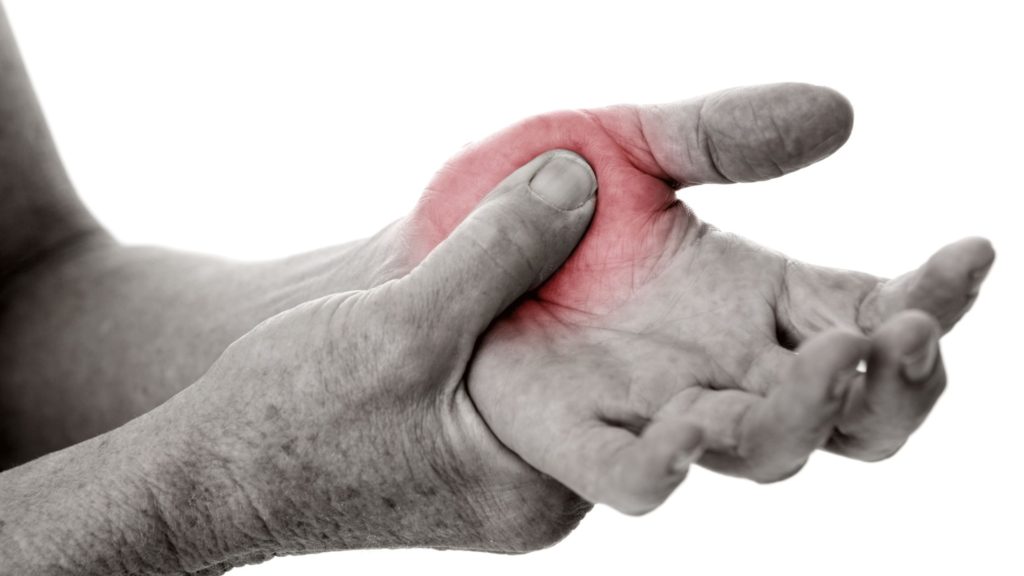


Recently, I tried opening a jammed door, so hit it several times with my hands. A few minutes after, I started feeling deep pain in wrist joint which hindered smooth movement of my thumb. I did not wasted any time and went to Wandsworth Physiotherapy for quick assistance, and my condition is better now.
Massage Therapy We prevent and treat a diverse range of injuries using hands on exercise modalities as well as the most sophisticated electrotherapy technology to get the best results