
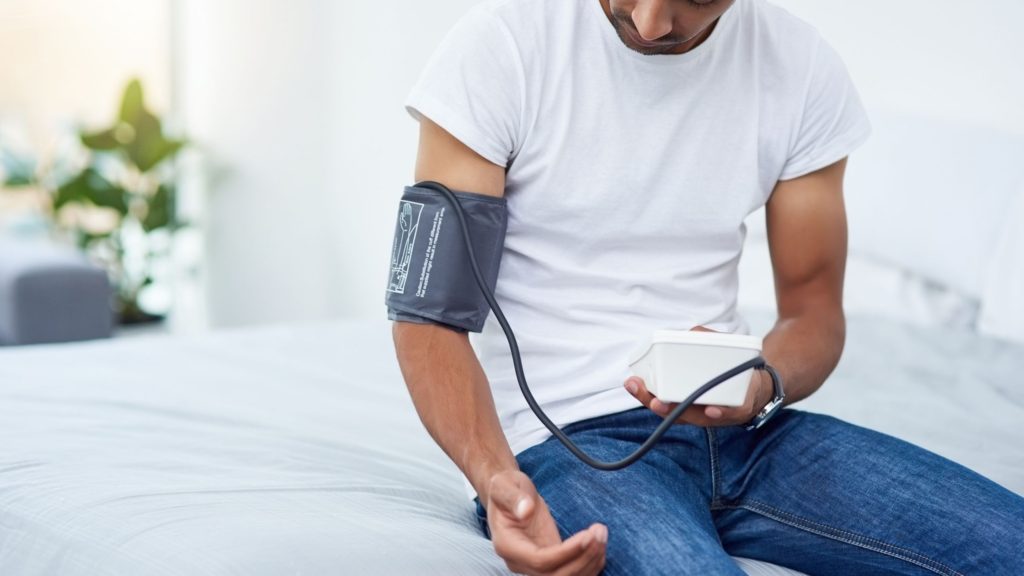
A digital blood pressure monitor is one of the most useful home health gadgets you can own. Whether you have high blood pressure, low blood pressure, or simply want to stay on top of your numbers, knowing how to use the device correctly is essential for reliable readings.
In this guide, we will walk through how to use the Dr Morepen BP-09 (the same steps work for most upper-arm digital monitors). You will learn the correct setup, positioning, measurement technique, common mistakes to avoid, and how to interpret your results.
How to use digital BP machine (Dr Morepen BP-09) at home
This tutorial focuses on the automatic Dr Morepen BP-09. The basic principle is the same for virtually all upper-arm digital blood pressure monitors (including popular brands such as Omron). If you still need a monitor, see our Ultimate Blood Pressure Monitor Buying Guide.
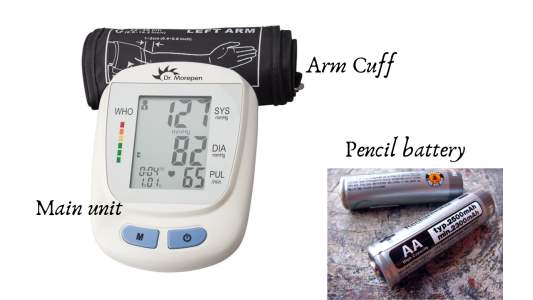
When you open the Dr Morepen BP-09 box, you get these 4 items:
- Arm cuff — an inflatable cuff with an air tube and connector jack.
- Four AA batteries — required to power the unit (a power adaptor can also be used but is sold separately).
- User manual
- Central unit — the main display and control unit.
Steps to use digital blood pressure monitor at home
Step 1: Set up the monitor
Step 2: Sit in the correct position
2. Remove tight-fitting clothing from your upper left arm.
3. Sit upright on a chair with both feet flat on the floor.
4. Rest your left arm on a table so the cuff will be at heart level.
5. Hold the cuff’s thumb grip with your right hand, ready to apply it.
Step 3: Apply the arm cuff
2. Place the cuff on your left upper arm so the blue stripe lies on the inside of the arm and lines up with your middle finger. The air tube should run down the inside of your arm.
3. Position the bottom edge of the cuff about 1–2 cm (½ inch) above the elbow crease.
4. Wrap the cuff firmly using the cloth fastener — it should be snug but not painfully tight.
Step 4: Take the reading
When the measurement is complete, the cuff deflates and three values appear:
• SYS — Systolic pressure (top number)
• DIA — Diastolic pressure (bottom number)
• PULSE — Heart rate in beats per minute
Note: The steps above work for most upper-arm digital blood pressure monitors. Below is a highly rated alternative (Omron) that many readers prefer for its accuracy and app connectivity.
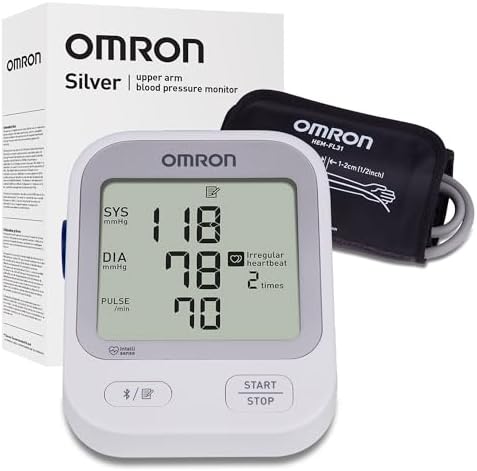
- CONFIDENCE IN EVERY READING: Monitor your heart health with the OMRON Silver Upper Arm Blood Pressure Monitor’s Advanced…
- SAFEGUARD YOUR HEART: Detect heartbeat irregularities during routine blood pressure measurements with OMRON’s Irregular …
- START YOUR DAY WITH CONFIDENCE: Know when your blood pressure is elevated with Hypertension Indicator alerts; Regular …
Things to avoid before taking a measurement
For the most reliable reading:
- Avoid eating, drinking alcohol, smoking, exercising, or bathing for at least 30 minutes beforehand. Rest quietly for 5–15 minutes.
- Do not measure during periods of high stress.
- Choose a quiet place and sit still — do not talk or move during the measurement.
- Keep a simple log of your readings (date, time, SYS/DIA/pulse) to share with your doctor. One reading is rarely enough; aim for several readings at roughly the same time each day.
Understanding your blood pressure reading
Your reading is written as systolic over diastolic (for example, 125/83). According to the American Heart Association (AHA) categories:
- Normal — less than 120 / less than 80
- Elevated — 120–129 / less than 80
- Stage 1 hypertension — 130–139 or 80–89
- Stage 2 hypertension — 140 or higher / or 90 or higher
- Hypertensive crisis — higher than 180 and/or higher than 120
When to see a doctor
- If readings are consistently in the Stage 1 or Stage 2 range, schedule an appointment with your healthcare provider.
- If a reading is higher than 180/120 and you have symptoms such as chest pain, shortness of breath, back pain, numbness, weakness, vision changes, or difficulty speaking, call emergency services immediately (this may be a hypertensive emergency).
- If a reading is higher than 180/120 without those symptoms, contact your doctor promptly for advice.
- Home monitors are excellent for tracking trends, but only a qualified clinician can diagnose or manage high blood pressure.
Final word
Keeping a reliable digital blood pressure monitor at home — such as the Dr Morepen BP-09 — makes it easy to track your numbers and share accurate data with your doctor. Follow the positioning and preparation tips above and you will get consistent, useful readings.
Also read: Blood pressure, cholesterol in young adult linked to risk of heart attack later
Keep Reading: How to Use Non-Contact Infrared Thermometer at Home

The author is a physiotherapist who has been practising for the last 17 years. He holds a Bachelor's in Physiotherapy (BPT) from SVNIRTAR (Swami Vivekananda National Institute of Rehabilitation and Research), one of the prestigious physiotherapy schools in India.
Whatever he learns dealing with his patient, he shares it with the world through blogs and e-books. He also owns a YouTube channel, "Sunit Physiotherapist" with over 8 lakh active subscribers. Here, he shares everything he gets to learn serving the patient.




Pingback: Ultimate Blood Pressure Monitor Buying Guide for You
Pingback: 11 Signs of Low Blood Pressure to Watchout For
Pingback: What are the signs of low blood pressure? : Physiosunit
Pingback: How to select at-home BP monitor for yourself & its types : Physiosunit
Pingback: How to Use Non Contact Infrared Thermometer at Home : Physiosunit
Pingback: Blood pressure, cholesterol in young adult linked to risk of heart attack later : Physiosunit