Last Updated on January 23, 2026 by Sunit. S. Ekka
Postoperatively ACL reconstruction surgery needs to follow a strict ACL reconstruction protocol. The exercises and protocol start right after the next day of surgery when you have to exercise on the hospital bed itself.
It progresses to make you bear weight on the operated leg with an aim to make walking independently.
In this article, we will discuss ACL reconstruction rehab protocol in phases. Although you must have given a guide from the concerned hospital, take this article as an overview of the protocol.
If you are a physiotherapist reading this article, you have to teach them and make them follow the rehabilitation protocol.
- Pre-Surgery Preparation: Why Prehab Matters
- ACL Reconstruction Recovery Timeline: The 4 Phases
- ACL Rehab PDF Guide: Step-by-Step Visual Instructions
- FAQ
Pre-Surgery Preparation: Why Prehab Matters
Research has found that rehabilitation before surgery improves the outcome after surgery. It is important to reduce swelling, inflammation, and pain, restore normal ROM, normalize walking, and prevent muscle atrophy prior to surgery.
The goal of preoperative rehabilitation is to return the knee to its preinjury, normalised state and to obtain tissue homeostasis 1.
The 21-day preoperative phase is typically adequate 1. You can follow the exercises in this article for 21 days prior to surgery. These exercises are aimed to strengthen muscles around the knee and improve the knee’s range of motion.
In my practice, I get the opportunity to deal with lots of post-operative ACL reconstruction patients. They are a bit afraid and apprehensive to take the first step.
It requires lots of self-confidence and a morale boost from physiotherapists to teach them weight bearing on the affected leg.
Standing and taking the very first step may sound silly, but for an ACL injury sufferer, it’s a struggle. Right after the injury then through the theatre, taking that first step is not easy. One has to go through a series of calculated steps of rehabilitation to reach this.
Once the individual starts walking independently without walking aids the next step becomes somewhat easy. So, let us discuss the step-by-step rehabilitation process after an ACL reconstruction surgery.
In our previous article “Symptoms of a Torn ACL, What to do at Home” we already discussed the symptoms, causes and conservative management of ACL injury. A partial tear of the ligament or sprain is manageable conservatively.
But if your knee is repeatedly giving way (instability) or if you are a sports personality you have to go for surgery.
If there is a complete tear of the ACL or a late case with a complaint of the instability of the knee then reconstruction surgery is the only option.
In this surgery, the ligament is constructed using the patient’s tendon or fascia lata. A tendon or fascia taken from another person (allograft) or a synthetic ligament has to be used.
ACL Reconstruction Recovery Timeline: The 4 Phases
Post-operative physiotherapy after ACL reconstruction is very important, It prevents lots of complications that otherwise would have developed. It also helps in the early rehabilitation of patients and early return to work or profession.
The reconstruction graft has to develop the blood supply and undergo revascularization. Also, the collagen fibres realign themselves this is why the ligament injury takes longer to heal.
Thus, the rehabilitation process is slow and long. Full rehabilitation can take anywhere from 6 months to 1 year. We can divide it into four phases.
- Phase-I- Maximum protection phase.
- Phase-II Moderate protection phase.
- Phase-III Minimum protection phase.
- Phase-IV Light activity phase.
Let us discuss each phase separately. Read it carefully and follow the protocol. If in doubt discuss it with your physiotherapist.
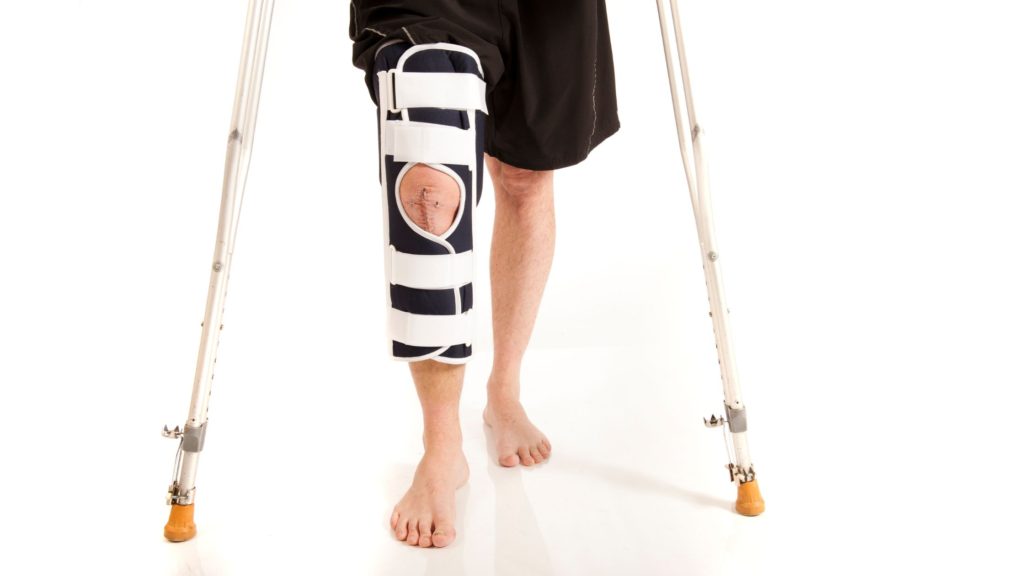
Phase 1: Maximum Protection (Weeks 0-2) – Early Recovery Essentials

This phase is known as the maximum protection phase, as it requires immense care and protection. It starts immediately after the surgery and lasts up to 2 weeks.
To prevent movement the knee joint is immobilised in a fully extended position using a brace. Strengthening exercises for the leg are encouraged with a knee brace on.
The RICE (Rest, Ice, Compression, Elevation) module is followed during this phase, which is very important to prevent swelling and pain.
That is, you have to rest your knee by keeping it straight and elevated when sitting or lying down by placing a layer of two pillows beneath the lower leg. Ice packs and compression are applied to prevent swelling and inflammation.
Do not rest with a towel placed under the knee as it will cause the knee to bend slightly. Support your surgical side when performing transfers (i.e. sitting to laying down).
Physiotherapy and rehabilitation during this phase are aimed at protecting the graft, reducing swelling, minimising pain, and restoring patellar mobility.
It also helps restore full extension, gradually improving flexion, minimising atherogenic muscle inhibition, re-establishing quad control, and regaining full active extension 1.
Phase 1 Exercises: Safe Movements to Restore Mobility
Exercises to improve knee range of motion/Mobility
- Patellar mobilizations: superior/inferior and medial/lateral
- Seated assisted knee flexion-extension and heel slides with towel
- Low intensity, long duration extension stretches: prone hang, heel prop
- Standing gastroc stretch and soleus stretch
- Supine active hamstring stretch and supine passive hamstring stretch
Knee strengthening exercises
- Ankle foot toe movement in long sitting
- Heel raises in standing
- Static quadriceps exercise
- Straight leg raise.
- Hip abduction
- Multi-angle isometrics 90 and 60-degree knee extension
Phase 2: Moderate Protection (Weeks 3-5) – Regaining Strength

We also call it a moderate protection phase. It starts from the 3rd week and lasts up to the 5th week. By the 3rd week, some of the knee strength is gained.
Now, it needs only moderate protection and some degree of movement is allowed. Continue doing strengthening exercises for the leg.
Closed chain knee exercises are added. Electrical stimulation after exercises.
Phase 2 Exercises: Closed-Chain Workouts for Stability
Range of Motion/Mobility
- Stationary bicycle
- Gentle stretching of all muscle groups: prone quad stretch, standing quad stretch
Strengthening
- Knee bending in prone
- Step-ups and step-ups with a marching
- Partial squat exercise
- Ball squats, wall squats, mini squats from 0-60 deg
- Bridging & unilateral bridging exercise, side-lying hip external rotation, bridges on a physioball, the bridge on physioball with roll-in, the bridge on physioball alternating
Balance/proprioception
- Single leg standing balance (knee slightly flexed) static progressed to dynamic and level
- progressed to an unsteady surface
- Lateral step-overs
- Joint position re-training
Phase 3: Minimum Protection (Weeks 6-12) – Building Endurance
Also called a minimum protection phase and starts from the 6th week of surgery and lasts up to 8 weeks. By now the patient can walk with a functional brace Range of motion exercises as tolerated. Strengthening exercises are also added.
We suggest close kinematic chain exercises.
Phase 3 Exercises: Dynamic Movements & Balance Drills
Range of motion/Mobility: Rotational tibial mobilizations if limited ROM
Cardio: 8 weeks: Elliptical, stair climber, flutter kick swimming, pool jogging
Strengthening
- Progress intensity (strength) and duration (endurance) of exercises. The following exercises focus on proper control with an emphasis on good proximal stability
- Squat to chair
- Lateral lunges
- Single leg progression: partial weight bearing single leg press, slide board lunges: retro and lateral, step-ups and step-ups with march, lateral step-ups, step downs, single leg squats, single leg wall slides
- Knee Exercises
- Seated Leg Extension (avoid anterior knee pain): 90-45 degrees with resistance
Balance/proprioception: Progress single limb balance including perturbation training
Phase 4: Light Activity (Months 3-5) – Returning to Normal
It is a phase between the 3rd month and to 4th month. Physiotherapy and rehabilitation in the light activity phase are aimed at safely progressing the strengthening, safely initiating a sport-specific training program.
It is aimed to promote proper movement patterns, avoiding post-exercise pain/swelling, and avoiding activities that produce pain at the graft donor site.
Now we should begin endurance stretching exercises. After 6 months Running initiated Stretching, strengthening, and endurance activity.
Phase 4 Exercises: Plyometrics & Agility Training
Interval running program
o Return to Running Program
• Progress to plyometric and agility program (with a functional brace if prescribed)
o Agility and Plyometric Program
ACL Rehab PDF Guide: Step-by-Step Visual Instructions
Explaining and making them follow the protocol is challenging. But, we can simplify it if we see the picture/ image of each step of the protocol.
We have designed the ACL rehabilitation protocol authored by me (Dr. sunit sanjay Ekka) beautifully illustrated by colourful illustrations.
If you are an ACL injury sufferer you can use it for yourself and if you are a Physiotherapist dealing with such a case, it can prove immensely useful to you.
When Can You Return to Sports? (9+ Months Post-Op)
After nine months from the day of operation, one can return to his/ her profession after nine months.
FAQ
The author is a physiotherapist who has been practising for the last 17 years. He holds a Bachelor's in Physiotherapy (BPT) from SVNIRTAR (Swami Vivekananda National Institute of Rehabilitation and Research), one of the prestigious physiotherapy schools in India.
Whatever he learns dealing with his patient, he shares it with the world through blogs and e-books. He also owns a YouTube channel, "Sunit Physiotherapist" with over 8 lakh active subscribers. Here, he shares everything he gets to learn serving the patient.


Pingback: Pain Below Knee Cap? Learn 8 Patellar Tendonitis Exercises for Quick Relief : Physiosunit