Key Takeaways:
- Upper limb stimulation targets triceps, wrist, and finger extensors.
- Lower limb stimulation focuses on quadriceps and tibialis anterior.
- Passive electrodes are placed near the neck (upper limb) or thigh (lower limb).
- Always follow safety guidelines and consult a physiotherapist before starting home stimulation.
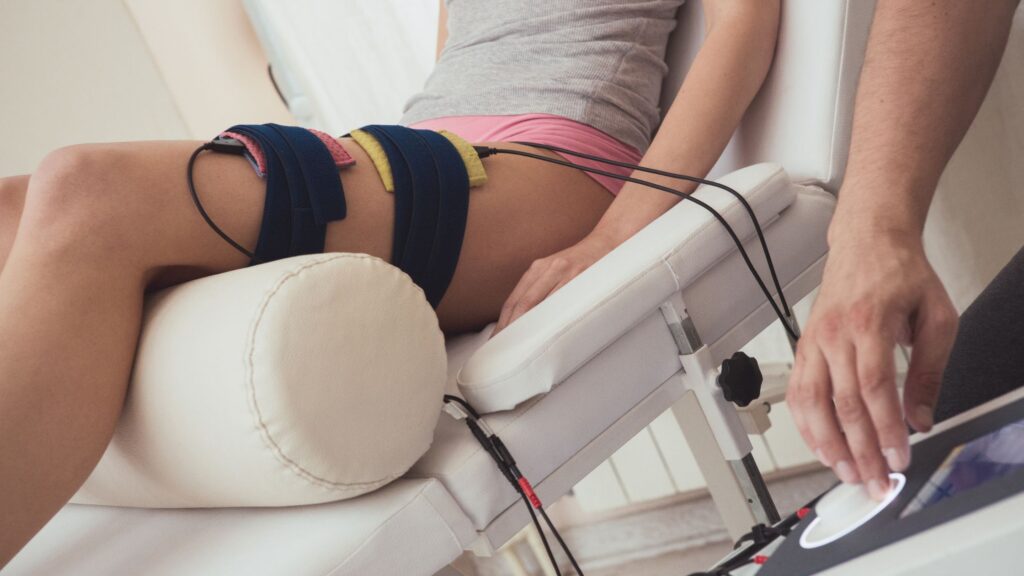
Brain stroke results in hemiplegia, in which one side of the body is paralysed. In addition to exercises, muscle stimulation is very important to regain the strength of the affected muscle and rehabilitate the sufferer.
For this, we must know the correct electrode placement for stroke patients so that we can give faradic or galvanic stimulation accordingly.
In this article, I will demonstrate to you that if you have a paralysis patient, then what will be the correct electrode placement to give muscle stimulation?
- Electrode Placement for Stroke Patients (Step-by-Step Guide)
- Upper Limb Electrode Placement for Stroke Recovery (Hand & Arm)
- How to Stimulate the Triceps Muscle After Stroke (With Electrodes)
- Correct Electrode Placement for Forearm Extensor Muscles
- Wrist & Finger Extension Stimulation: Electrode Setup for Stroke Patients
- Lower Limb Stimulation: Electrode Placement for Leg & Foot Paralysis
- FAQs
Electrode Placement for Stroke Patients (Step-by-Step Guide)
One side of the body is paralysed in hemiplegia, mainly the hand and leg. A severe brain stroke can also result in one-sided face muscle paralysis.
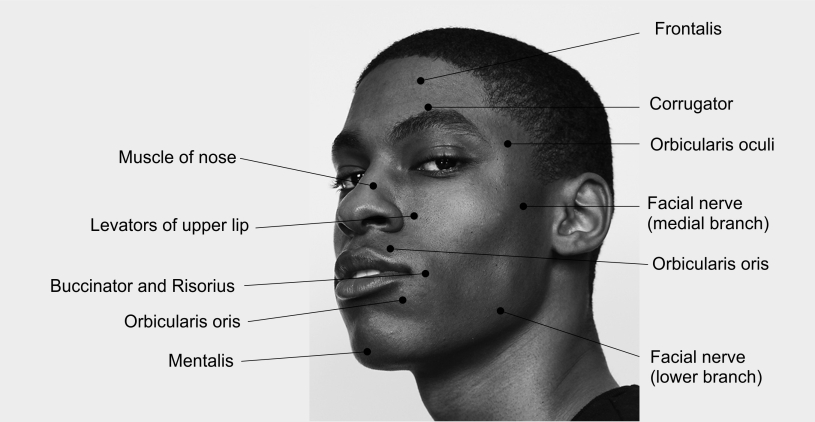
For face paralysis, galvanic muscle stimulation is given; we have already discussed the facial paralysis motor point for muscle stimulation.
Alongside stimulation, a structured home exercise programme speeds up recovery — see our complete guide to Bell’s Palsy exercises.
Upper and lower limb paralysis involves stiffening the flexor group of muscles and weakening the extensor group of muscles.
So physiotherapy would aim to stretch the tight flexor muscle group and strengthen the weak extensor group of muscles. We will use a muscle stimulator to enhance the extensor group of muscles.
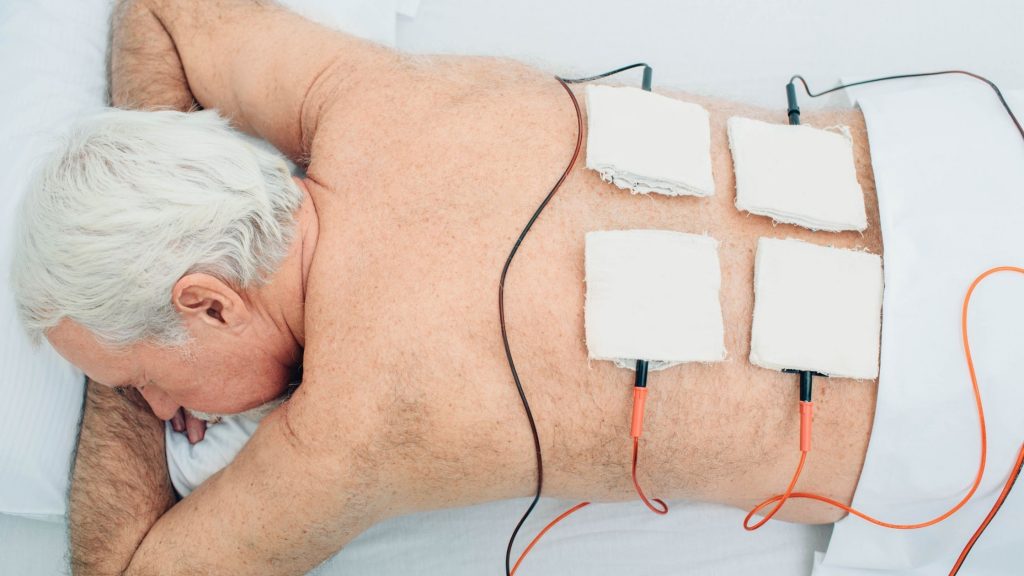
For the upper limb, your passive electrode will be near C7 and T1 on the neck. The best way is to use the sandbag I use in my clinical practice, which we will keep under the neck.
⚠️ Important Safety Guidelines & Contraindications
Before starting electrical muscle stimulation:
- Contraindications (do not use): Pacemaker or other implanted electronic devices, uncontrolled epilepsy, active malignancy over the treatment area, open wounds or skin infections at electrode sites, severe sensory loss (risk of burns), pregnancy (over abdomen/low back), and acute thrombosis.
- Always clean the skin and ensure good electrode contact. Start at low intensity and increase gradually until a comfortable visible muscle contraction is achieved.
- Never leave a patient unsupervised during the first few sessions. Stop immediately if pain, dizziness, or skin irritation occurs.
- This guide is for educational purposes. Treatment should be prescribed and supervised by a qualified physiotherapist.
Upper Limb Electrode Placement for Stroke Recovery (Hand & Arm)
The muscle stimulator has two electrodes: the red passive electrode and the black active electrode. As I said, the passive electrode will be under the neck.
The purpose of the sandbag is to keep the passive electrode compressed and stable at the neck. Now, the active, black electrode is placed on the motor point (usually the bulkiest part of the muscle) of the concerned muscle.
Our target muscles for the upper limb are the triceps, wrist, and finger extensor muscles. So, let’s start with the triceps muscle.
Note:
Active Electrode Red or Black: On most machines used in clinical practice, the Black electrode is Active and the Red is the Passive (indifferent) electrode. Always confirm with your specific device manual, as colour coding can vary.
How to Stimulate the Triceps Muscle After Stroke (With Electrodes)
To stimulate the triceps muscle, follow these steps:
- Position the passive electrode behind the neck while the patient is lying down. Place a sandbag beneath the neck to keep the electrode in place.
- Locate the motor point of the triceps muscle on the posterior (back) aspect of the upper arm, at the bulkiest part of the muscle belly (approximately mid-upper arm).
- Secure the active electrode on the motor point with a strap.
Correct Electrode Placement for Forearm Extensor Muscles
To strengthen the forearm extensor muscles, we need to follow these steps for electrode placement and stimulation:
- Place the passive electrode on the back of the neck as before.
- Locate the bulkiest point of the forearm extensor muscle group on the outer (lateral) side of the elbow, near the common extensor origin.
- Place the active (black) electrode at this motor point on the outer side of the elbow.
- Administer stimulation for 10 minutes using the active electrode at the motor point of the forearm extensor muscle.
Wrist & Finger Extension Stimulation: Electrode Setup for Stroke Patients
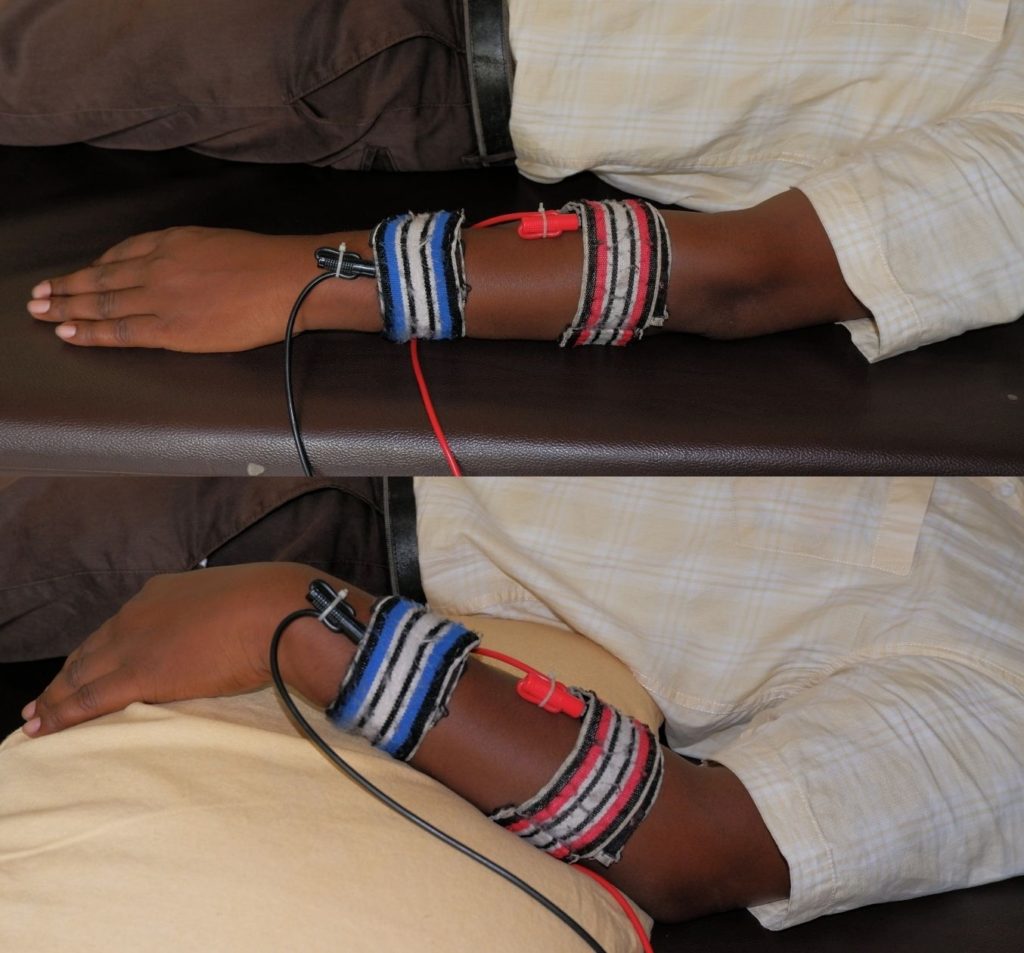
Let’s go to finger extensors. For finger extensors, the electrode placement will be different. You must place both active and passive electrodes over the forearm.
The wrist and finger extensor muscles are the same group of muscles that we just discussed above.
- To target the finger extensors, begin by placing the passive electrode over the bulky muscle on the outer side of the forearm near the wrist.
- Then, place the active electrode approximately 2 inches above the wrist joint on the lower one-third of the forearm.
- Once the electrodes are in place, increase the intensity of stimulation to activate the wrist and finger extensor muscles.
- For optimal effectiveness, consider using a pillow to support the forearm, allowing for better wrist movement during the procedure.
Watch our Hindi video tutorial for live electrode placement demonstration: Click here to unlock full video guide
While surface electrical stimulation remains a valuable tool in daily physiotherapy practice, newer approaches such as spinal cord stimulation for restoring hand movement after stroke are also being explored in research settings and show promising early results.1
NMES vs FES – a quick note: The placements described in this article primarily use neuromuscular electrical stimulation (NMES) to strengthen weak muscles by producing a muscle contraction at rest. Functional electrical stimulation (FES) uses similar electrode positions but times the stimulation during a functional task (e.g., while reaching or walking) so the muscle contracts in a useful pattern.
Both approaches are supported by clinical evidence for improving upper- and lower-limb function after stroke when combined with conventional therapy.23
Lower Limb Stimulation: Electrode Placement for Leg & Foot Paralysis
In our legs, too, we have to target the extensor group of muscles. The main extensor group of muscles are the Quadriceps and the Tibialis Anterior muscles. The quadriceps muscle is present on the front of the thigh, and its action brings knee extension motion.
The tibialis anterior muscle is present in the front of the lower leg. Its action brings dorsiflexion motion to the foot. The weakness or paralysis of this muscle results in a disability known as foot drop.
The weakness of these two groups of muscles alters the normal gait and makes walking difficult. The abnormal gait pattern in hemiplegia is known as circumduction gait or hemiplegic gait.
So, let us start with the quadriceps muscle.
Note that this stroke protocol uses a muscle stimulator to strengthen weak muscles — which is different from using a TENS unit for pain relief. If you’re specifically dealing with knee joint pain rather than paralysis, see our separate guide on how to use a TENS unit for knee pain and correct electrode placement.
Also Read: Exercise Treatment of Guillain Barre Syndrome Simplified
Quadriceps Stimulation After Stroke: Where to Place Electrodes
To perform the quadriceps muscle electrical stimulation exercise, you’ll begin by preparing the passive and active electrodes.
- The passive electrode should be placed over the upper end of the front thigh, ensuring a snug and comfortable fit.
- The active electrode requires a bit more attention to detail. It should be placed just about 2 inches above the patella. To ensure proper placement, you will need to tie a strap above the patella and then place the electrode in this area.
- Next, once both electrodes are correctly in place, it’s time to initiate the electrical stimulation.
- Set the machine to run for 10 minutes. This duration is sufficient to ensure that the quadriceps muscle is adequately stimulated and ready for use.
- Following these steps diligently will help you effectively engage in the quadriceps muscle electrical stimulation exercise, facilitating muscle activation and support.
Electrode placement for foot drop
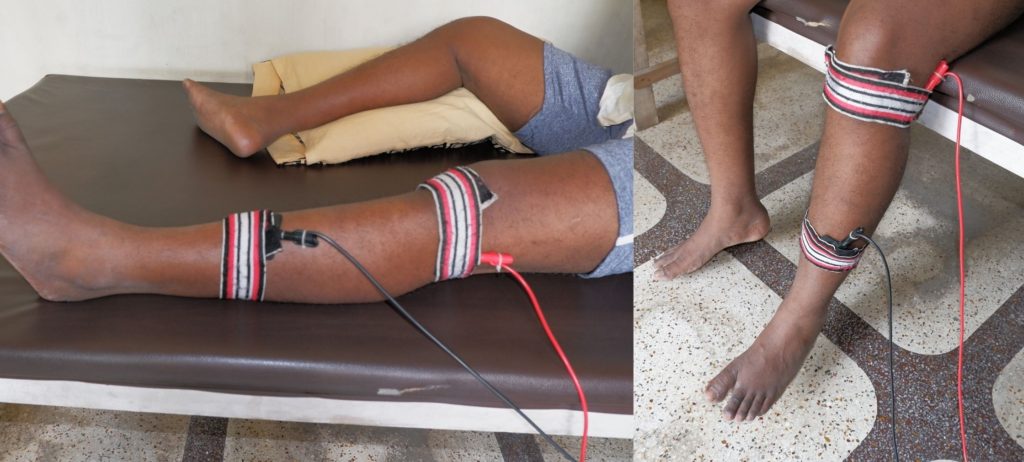
The Tibialis anterior is the muscle located on the front of the leg, and it is crucial to strengthen it as it impacts the way we walk. The foot drop problem, where the foot cannot be lifted properly, is often associated with a weakened Tibialis anterior.
Strengthening this muscle can significantly alleviate the foot drop problem.
The Tibia is the bone on the inner side of the leg, while the Fibula is the bone on the outer side. A nerve supplying the Tibialis anterior passes through the lateral part of the fibula.
To stimulate the Tibialis anterior:
- Place the passive electrode just behind the tibial bone on the outer side of the upper leg.
- The active electrode should be placed on the bulky area in the middle of the Tibialis muscle, specifically on the mid part of the front of the leg.
- By increasing stimulation, the muscle can produce foot dorsiflexion motion. If foot motion is not produced, adjust the passive electrode slightly and test the effect.
- The same placement can be used to stimulate foot drop while the patient is in a sitting position. This can help evaluate the effectiveness of the treatment.
- When the patient is seated, asking them to move the foot up will enhance the effectiveness of the treatment.
Clinical practice guidelines support the use of FES (or AFO) for improving gait speed, mobility, and dynamic balance after stroke.4
Share this guide with caregivers or therapists who might find it helpful!
Keep Reading: Hemiplegia can regain hand movement by artificial neural connection
This electrode-placement protocol is one module of our full Stroke & Hemiplegia Rehabilitation course, which also covers assessment, exercise therapy, and gait re-education.
FAQs

The author is a physiotherapist who has been practising for the last 17 years. He holds a Bachelor's in Physiotherapy (BPT) from SVNIRTAR (Swami Vivekananda National Institute of Rehabilitation and Research), one of the prestigious physiotherapy schools in India.
Whatever he learns dealing with his patient, he shares it with the world through blogs and e-books. He also owns a YouTube channel, "Sunit Physiotherapist" with over 8 lakh active subscribers. Here, he shares everything he gets to learn serving the patient.